This is the second part of our Gamify Moodle series, which is designed to help you gamify courses on the super-popular learning management system Moodle using Playlyfe.
In the first part, we saw how to start with Moodle plugin, and the second part showed how to dynamically add metrics, levels and badges to the Moodle installation. This last part shows how to link Moodle user profiles to Playlyfe, and creation of flexible custom rules which can be invoked freely to award badges or points to users.
When you add gamification into your Moodle LMS using Playlyfe, all the gamification stuff is taken care by Playlyfe. This is how it happens:
Whenever a new user is created on Moodle, a new player is created within your Playlyfe game. An action the Moodle user does is mapped to an action on Playlyfe. This helps us keep the gamification data separate, but still linked, to users in your system. If you want the user's scores, you will read the player's profile from Playlyfe. A simple example to illustrate how to maintain this mapping is to use the Moodle user's ID as the ID of the player on Playlyfe.
So, how are we going to map the Moodle user profile to Playlyfe's engine? We'll have to plug into the exhaustive and super-cool Event System which is offered by Moodle. This system emits events whenever different things happen in Moodle. Any plugin can listen to these events and perform appropriate actions.
For more information on the event structure and types of events, have a look at Moodle's Events Docs.
So, how does this help us? The first thing that should come to your mind is that an event should be emitted when a user registers! Yup it does! We use the \core\event\user_created event when a user registers on Moodle. Lets create an event observer for it.
Events
Create a new file in the db folder called events.php with this content:
<?php
/* blocks/playlyfe/db/events.php */
$observers = array(
  array(
    'eventname'  => '\core\event\user_created',
    'callback'   => 'block_playlyfe_observer::create_player',
  ),
  array(
    'eventname'  => '\core\event\user_loggedin',
    'callback'   => 'block_playlyfe_observer::log_in',
  ),
  array(
    'eventname'  => '\core\event\user_loggedout',
    'callback'   => 'block_playlyfe_observer::log_out',
  ),
  array(
    'eventname'  => 'core\event\course_completed',
    'callback'   => 'block_playlyfe_observer::course_completed',
  ),
  array(
    'eventname'  => 'mod_forum\event\post_created',
    'callback'   => 'block_playlyfe_observer::forum_post_created',
  ),
  array(
    'eventname'  => 'mod_forum\event\discussion_created',
    'callback'   => 'block_playlyfe_observer::forum_discussion_created',
  ),
  array(
    'eventname'  => 'mod_quiz\event\attempt_submitted',
    'callback'   => 'block_playlyfe_observer::quiz_attempt_submitted',
  ),
);
What this does is that it allows the plugin to, for example, register the user_created event and call a function whenever the event occurs. As you can see, the associated callback points to the function block_playlyfe_observer::create_player.
So, we've got to create a file called observer.php in the classes folder with this content.
<?php
/* blocks/playlyfe/classes/observer.php */
class block_playlyfe_observer {
  public static function create_player(\core\event\user_created $event) {
    $pl = block_playlyfe_sdk::get_pl();
    $user = $event->get_record_snapshot('user', $event->objectid);
    $can_modify = has_capability('block/playlyfe:addinstance', context_user::instance($user->id));
    $pl->post('/admin/players', array(), array('id' => $user->id, 'alias' => $user->firstname.' '.$user->lastname));
  }
}
The observer class contains a static function create_player which is called when the \core\event\user_created event is triggered. In the function, we extract the user data from the event and then make a post request to Playlyfe to create a player.
POST /admin/players with the following data:
{
  "id": "the player's unique id",
  "alias": "the name of the player"
}
Now whenever a user is created on Moodle, a player in also created on Playlyfe. Before you can try this out, you'd need to bump your plugin version. You'll have to do this everytime you make changes to your plugin code. This is because Moodle caches all plugins events so when you bump the version it invalidates the cache thereby updating the event observers for your plugin with the latest code. Go to version.php in your folder and increase the version number.
You can now go to admin -> users and add a new user. Then check out the players section in the Explorer in your Playlyfe game to verify that a player has indeed been created.
So, you saw how simple it is to associate your Moodle users to Playlyfe players. Now we want to able to reward this player for finishing some tasks within Moodle. This is where rules come into place.
Rules
There are 3 types of rules in Playlyfe: Levels, Achievements and Custom Rules. Level rules associate states with thresholds to define the different levels a player can achieve. Achievement rules award badges when certain conditions are met. Both these rules are executed everytime a player triggers a task on Playlyfe. But right now, I'll be talking more about Custom Rules. These are super-flexible rules which can be used for anything not offered by levels or achievements. Custom Rules also have a dubious advantage that they are not executed when players trigger tasks, but rather they have to be triggered manually. This can be especially useful in a closed system like an LMS, as you can decide when to trigger the rules depending on some custom logic you decide.
So, let's dive deep into how custom rules can be used.
The rules route in Playlyfe follows the RESTful API design. These are the exposed routes:
GET /design/versions/latest/rules returns all rules
POST /design/versions/latest/rules creates a new rule
GET /design/versions/latest/rules/:rule_id reads a rule with id rule_id
PATCH /design/versions/latest/rules/:rule_id updates a rule with id rule_id
DELETE /design/versions/latest/rules/:rule_id deletes a rule with id rule_id
The full JSON structure of the custom rule is as follows:
Custom Rule Structure
{
  "id": "log_in",
  "name": "log_in",
  "type": "custom",
  "rules": [
    {
      "rewards": [
        {
          "metric": {
            "id": "knowledge",
            "type": "point"
          },
          "verb": "add",
          "value": "10"
        }
      ],
      "requires": {}
    }
  ],
  "variables": [
    {
      "name": "score",
      "type": "int",
      "required": false,
      "default": 0
    }
  ]
}
Here the id is the unique id of the rule and is used for CRUD operations.
The name is what is generally displayed to the end user. The type is custom to indicate it's a custom rule.
The rules array is used to store all the rewards (rewards key)a player gets when you trigger the rule for him, and the requirements (requires key) associated with those rewards. rewards is itself an array of rewards, each having a:
metricobject specifying which metric to reward the user withverbwhich can be one ofadd,setorremovefor adding, setting or removing from the users score andvaluewhich is the amount the player will get.
The requires field defines certain conditions which have to be evaluated before the user can win these rewards.
The variables array allows us to define variables — external parameters which affect the rule evaluation. It has:
namewhich is used to identify it,typewhich can be int or string and is used to verify what input you are going to assign this variable, andrequiredwhich tells whether this variable is necessary for the rule to execute.defaultis the default value for the variable if it's not required.
In the data I've presented above, we have a variable with then name score and of type int, its not required as not all events will have a score, and thus it has a default value of 0.
You can learn more about custom rules in the Custom Rules Manual.
Now that you're aware with how Custom Rules work, lets take a task like completing a course and let's award the player doing it some points and maybe a badge.
We'd need to add some UI for creating a rule and some code which triggers this rule.
So modify the edit_form.php file and add a new config type in the $types variable:
$types = array(
  '0' => 'Points',
  '1' => 'Badges',
  '2' => 'Levels',
  '3' => 'Events'
);
That's all nice and dandy, but there are a LOT of events in moodle! And going around adding a UI for each event feels just plain wrong (and too much work too!). So, we'd create juts one single place — a block which can handle mutiple events. Teachers should be able to switch what type of event the block is showing.
So add all the events that you'd like the admins (teachers) to be able to select from.
Add a new variable $events which the teacher can select when they are configuring the block.
<?php
/* edit_form.php */
$events = array('0' => 'LoggedIn', '1' => 'LoggedOut', '2' => 'CourseCompleted', '3' => 'Forum Posted', '4' => 'Forum Discussion Created', '5' => 'Quiz Submitted');
$mform->addElement('select', 'config_event', 'Event', $events);
$mform->setDefault('config_event', 0);
Now that we added the event codes for 3 new events these need to be handled in our block.
In the block_playlyfe.php file, add a new switch case which handles different events:
<?php
/* block_playlyfe.php */
  switch ($this->config->event) {
    case 0:
      $rule_id = "log_in";
      $this->title = 'Logged In Rule';
      break;
    case 1:
      $rule_id = "log_out";
      $this->title = 'Logged Out Rule';
      break;
    case 2:
      // Find context if not course then display this block must be shown only on course page
      $currentcontext = $this->page->context->get_course_context(false);
      if(empty($currentcontext)) {
        $this->content->text = 'This block must be present on a course page';
        return;
      }
      $this->title = 'Course Completed Rule';
      $rule_id = "course_completed_".$this->page->course->id;
      break;
   case 3:
      $currentcontext = $this->page->context->get_course_context(false);
      if(empty($currentcontext)) {
        $this->content->text = 'This block must be present on a course page';
        return;
      }
      $this->title = 'Forum Post Created Rule';
      $rule_id = "forum_post_created_".$this->page->course->id;
      break;
   case 4:
      $currentcontext = $this->page->context->get_course_context(false);
      if(empty($currentcontext)) {
        $this->content->text = 'This block must be present on a course page';
        return;
      }
      $this->title = 'Forum Discussion Created Rule';
      $rule_id = "forum_discussion_created_".$this->page->course->id;
      break;
   case 5:
      $id = optional_param('id', null, PARAM_INT);
      if(!$id) {
        $this->content->text = 'This block must be present on the quiz page';
        return;
      }
      $currentcontext = $this->page->context->get_course_context(false);
      if(empty($currentcontext)) {
        $this->content->text = 'This block must be present on a course page';
        return;
      }
      $this->title = 'Quiz Submitted Rule';
      $rule_id = "quiz_attempt_submitted_".$id;
      break;
  }
  $point = $pl->get('/design/versions/latest/metrics/point');
  $badges = $pl->get('/design/versions/latest/metrics', array('fields' => 'id,name,description,type,image', 'tags' => 'badge'));
  // We then fetch the rule and if it does not exist we create it
  try {
    $rule = $pl->get('/design/versions/latest/rules/'.$rule_id);
  }
  catch(Exception $e) {
    if($e->name == 'rule_not_found') {
      $rule = $pl->post('/design/versions/latest/rules', array(), array(
        'id' => $rule_id,
        'name' => $rule_id,
        'type' => 'custom',
        'rules' => array(
          array(
            'rewards' => array(),
            'requires' => new StdClass
          )
        ),
        'variables' => array(
          array(
            'name' => 'score',
            'type' => 'int',
            'required' => false,
            'default' => 0
          ),
          array(
            'name' => 'time_completed',
            'type' => 'int',
            'required' => false,
            'default' => 0
          ),
          array(
            'name' => 'course_id',
            'type' => 'int',
            'required' => false,
            'default' => 0
          )
        )
      ));
    } else {
      throw $e;
    }
  }
  $this->content->text = '<div id="pl_'.$rule_id.'_block"></div>';
  $this->page->requires->js_init_call('init_rule_list',
    array(array('rule' => $rule, 'point' => $point, 'badges' => $badges))
  );
Now we need to add a new javascript class which will render out this rule's rewards and allow users to add or remove rewards from the rule.
/* block_playlyfe.js */
/**
 * Creates a new RuleList Object
 */
function init_rule_list(version, data) {
  var ruleList = new RuleList(data.rule, data.point, data.badges);
}
function RuleList(rule, point, badges) {
  this.id = 'pl_'+rule.id+'_block';
  this.$el = $('#'+this.id);
  this.rule = rule;
  this.rewards = [];
  this.point = point;
  this.point.value = '0';
  this.badges = badges;
  this.count = 0;
  this.render();
  for(var i=0; i < rule.rules[0].rewards.length;i++) {
    var reward = rule.rules[0].rewards[i];
    if(reward.metric.id === this.point.id) {
      $('#'+this.id+'_point_value').val(reward.value);
      continue;
    }
    this.add(reward.metric.id, reward.value);
  }
}
RuleList.prototype.render = function() {
  html =
  '<div>' +
    '<p>How many '+this.point.name+' Points would you like to reward?</p>' +
    '<input id="'+this.id+'_point_value" type="number" value="0"></input>' +
  '</div>' +
  '<div>' +
    '<p>What Badges would you like to reward?</p>' +
  '</div>' +
  '<table id="'+this.id+'_table" class="generaltable">' +
    '<thead>' +
      '<tr>' +
        '<th class="header c1 lastcol centeralign" style="" scope="col">Metric</th>' +
        '<th class="header c1 lastcol centeralign" style="" scope="col">Value</th>' +
      '</tr>'+
    '</thead>' +
  '<tbody>' +
  '</tbody>' +
  '</table>';
  html += '<select id="'+this.id+'_select">';
  for(var i=0; i < this.badges.length; i++) {
    var metric = this.badges[i];
    html += '<option class="text-left" value="'+metric.id+'">'+metric.name+'</option>';
  }
  html += '</select><input style="width:60px;" id="'+this.id+'_value" type="number" value="1"></input><button id="'+this.id+'_add">Add</button><button id="'+this.id+'_save">Save</button>';
  this.$el.html(html);
  var self = this;
  $('#'+self.id+'_add').click(function() {
    var metric = $('#'+self.id+'_select').val();
    var value = $('#'+self.id+'_value').val();
    if(metric) {
      self.add(metric, value);
    }
  });
  $('#'+this.id+'_save').click(function() {
    self.save(self);
  });
}
/* add a rewards list and also renders this reward in the table */
RuleList.prototype.add = function(id, value) {
  this.count++;
  var tag_id = this.id+'_'+this.count;
  this.$el.find('#'+this.id+'_table tbody').append(
    '<tr id="'+tag_id+'_row">' +
      '<td>' +
        id +
      '</td>' +
      '<td style="vertical-align: middle;">' +
        '<div style="position: relative;">'+
          value +
          '<img style="position: absolute;right: 0px;bottom: 5px;" src="http://localhost:3000/theme/image.php/clean/core/1432795487/t/delete" id="'+tag_id+'_delete">' +
        '</div>' +
      '</td>' +
    '</tr>'
  );
  this.addReward(id, value);
  var self = this;
  $('#'+tag_id+'_delete').click(function(){
    $('#'+tag_id+'_row').remove();
    self.removeReward(id);
  });
}
/* adds a reward to rewards list */
RuleList.prototype.addReward = function(id, value) {
  /* If its already there update it */
  for(var i=0; i < this.rewards.length; i++) {
    if (this.rewards[i].metric.id === id) {
      this.rewards[i].value = value;
      return;
    }
  }
  /* otherwise push it */
  this.rewards.push({
    metric: {
      id: id,
      type: 'point'
    },
    verb: 'add',
    value: value
  })
  $('#'+this.id+'_select option[value="'+id+'"]').remove(); // remove metric from list
}
/* removes a reward to rewards list */
RuleList.prototype.removeReward = function(id) {
  for(var i = 0; i < this.rewards.length; i++) {
    if (this.rewards[i].metric.id === id) {
      this.rewards.splice(i, 1);
      this.$el.find('#'+this.id+'_select')
      .append('<option class="text-left" value="'+id+'">'+id+'</option>');
      break;
    }
  }
}
/* Makes an ajax request to save the rewards */
RuleList.prototype.save = function(self) {
  var points = $('#'+self.id+'_point_value').val();
  self.addReward(self.point.id, points);
  makeApi('PATCH', '/design/versions/latest/rules/'+self.rule.id, {
    type: 'custom',
    rules: [
      {
        rewards: self.rewards,
        requires: {}
      }
    ]
  })
  .done(function() {
    alert('Saved Successfully');
  });
}
Now, let's add some real gamification — let's reward users on completing courses. For this, we are going to use the \core\event\course_completed event. We need to handle this event in our observer and also the login and logout events also since we registered them before.
<?php
/* classes/observer.php */
class block_playlyfe_observer {
  public static function create_player(\core\event\user_created $event) {
    $pl = block_playlyfe_sdk::get_pl();
    $user = $event->get_record_snapshot('user', $event->objectid);
    $pl->post('/admin/players', array(), array('id' => $user->id, 'alias' => $user->firstname.' '.$user->lastname));
  }
  public static function log_in(\core\event\user_loggedin $event) {
    self::execute_rule('log_in', $event->userid);
  }
  public static function log_out(\core\event\user_loggedout $event) {
    self::execute_rule('log_out', $event->userid);
  }
  public static function course_completed(\core\event\course_completed $event) {
    self::execute_rule('course_completed_'.$event->courseid, $event->user_id);
  }
  public static function forum_post_created(mod_forum\event\post_created $event) {
    self::execute_rule('forum_post_created_'.$event->courseid, $event->userid);
  }
  public static function forum_discussion_created(mod_forum\event\discussion_created $event) {
    self::execute_rule('forum_discussion_created_'.$event->courseid, $event->userid);
  }
  public static function quiz_attempt_submitted(mod_quiz\event\attempt_submitted $event) {
    self::execute_rule('quiz_attempt_submitted_'.$event->contextinstanceid, $event->relateduserid);
  }
  public static function execute_rule($rule_id, $user_id, $variables = array()) {
    $pl = block_playlyfe_sdk::get_pl();
    try {
      $pl->post('/admin/rules/'.$rule_id, array(), array(
        'data' => array(
          array(
            'player_ids' => array(''.$user_id ),
            'variables' => (object)$variables,
          )
        )
      ));
    }
    catch(Exception $e) {
      if($e->name != 'rule_not_found') {
        throw $e;
      }
    }
  }
}
In the observer class, we added a new function execute_rule which takes a rule_id, a user_id and some variables. This function then triggers the custom rule by making a POST request to the route /admin/rules/$rule_id on Playlyfe.
The body contains a data key which is an array of objects. Each object has a player_ids array which contains all the players that will be affected by the rule. Remember that we associate every user in Moodle to a player in Playlyfe.
The body also has a variables object which is used to send the runtime variables, if any, for evaluating the rule. For example,
ex: $variables = array('score' => 10);
You can check out our manuals for more details: Rule Execute
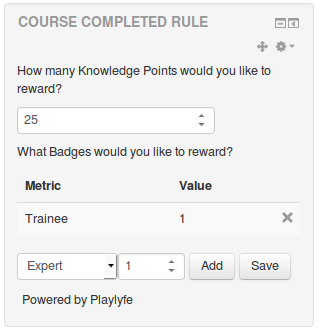
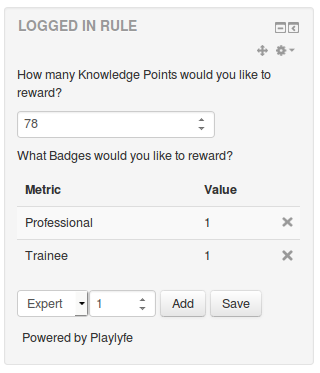
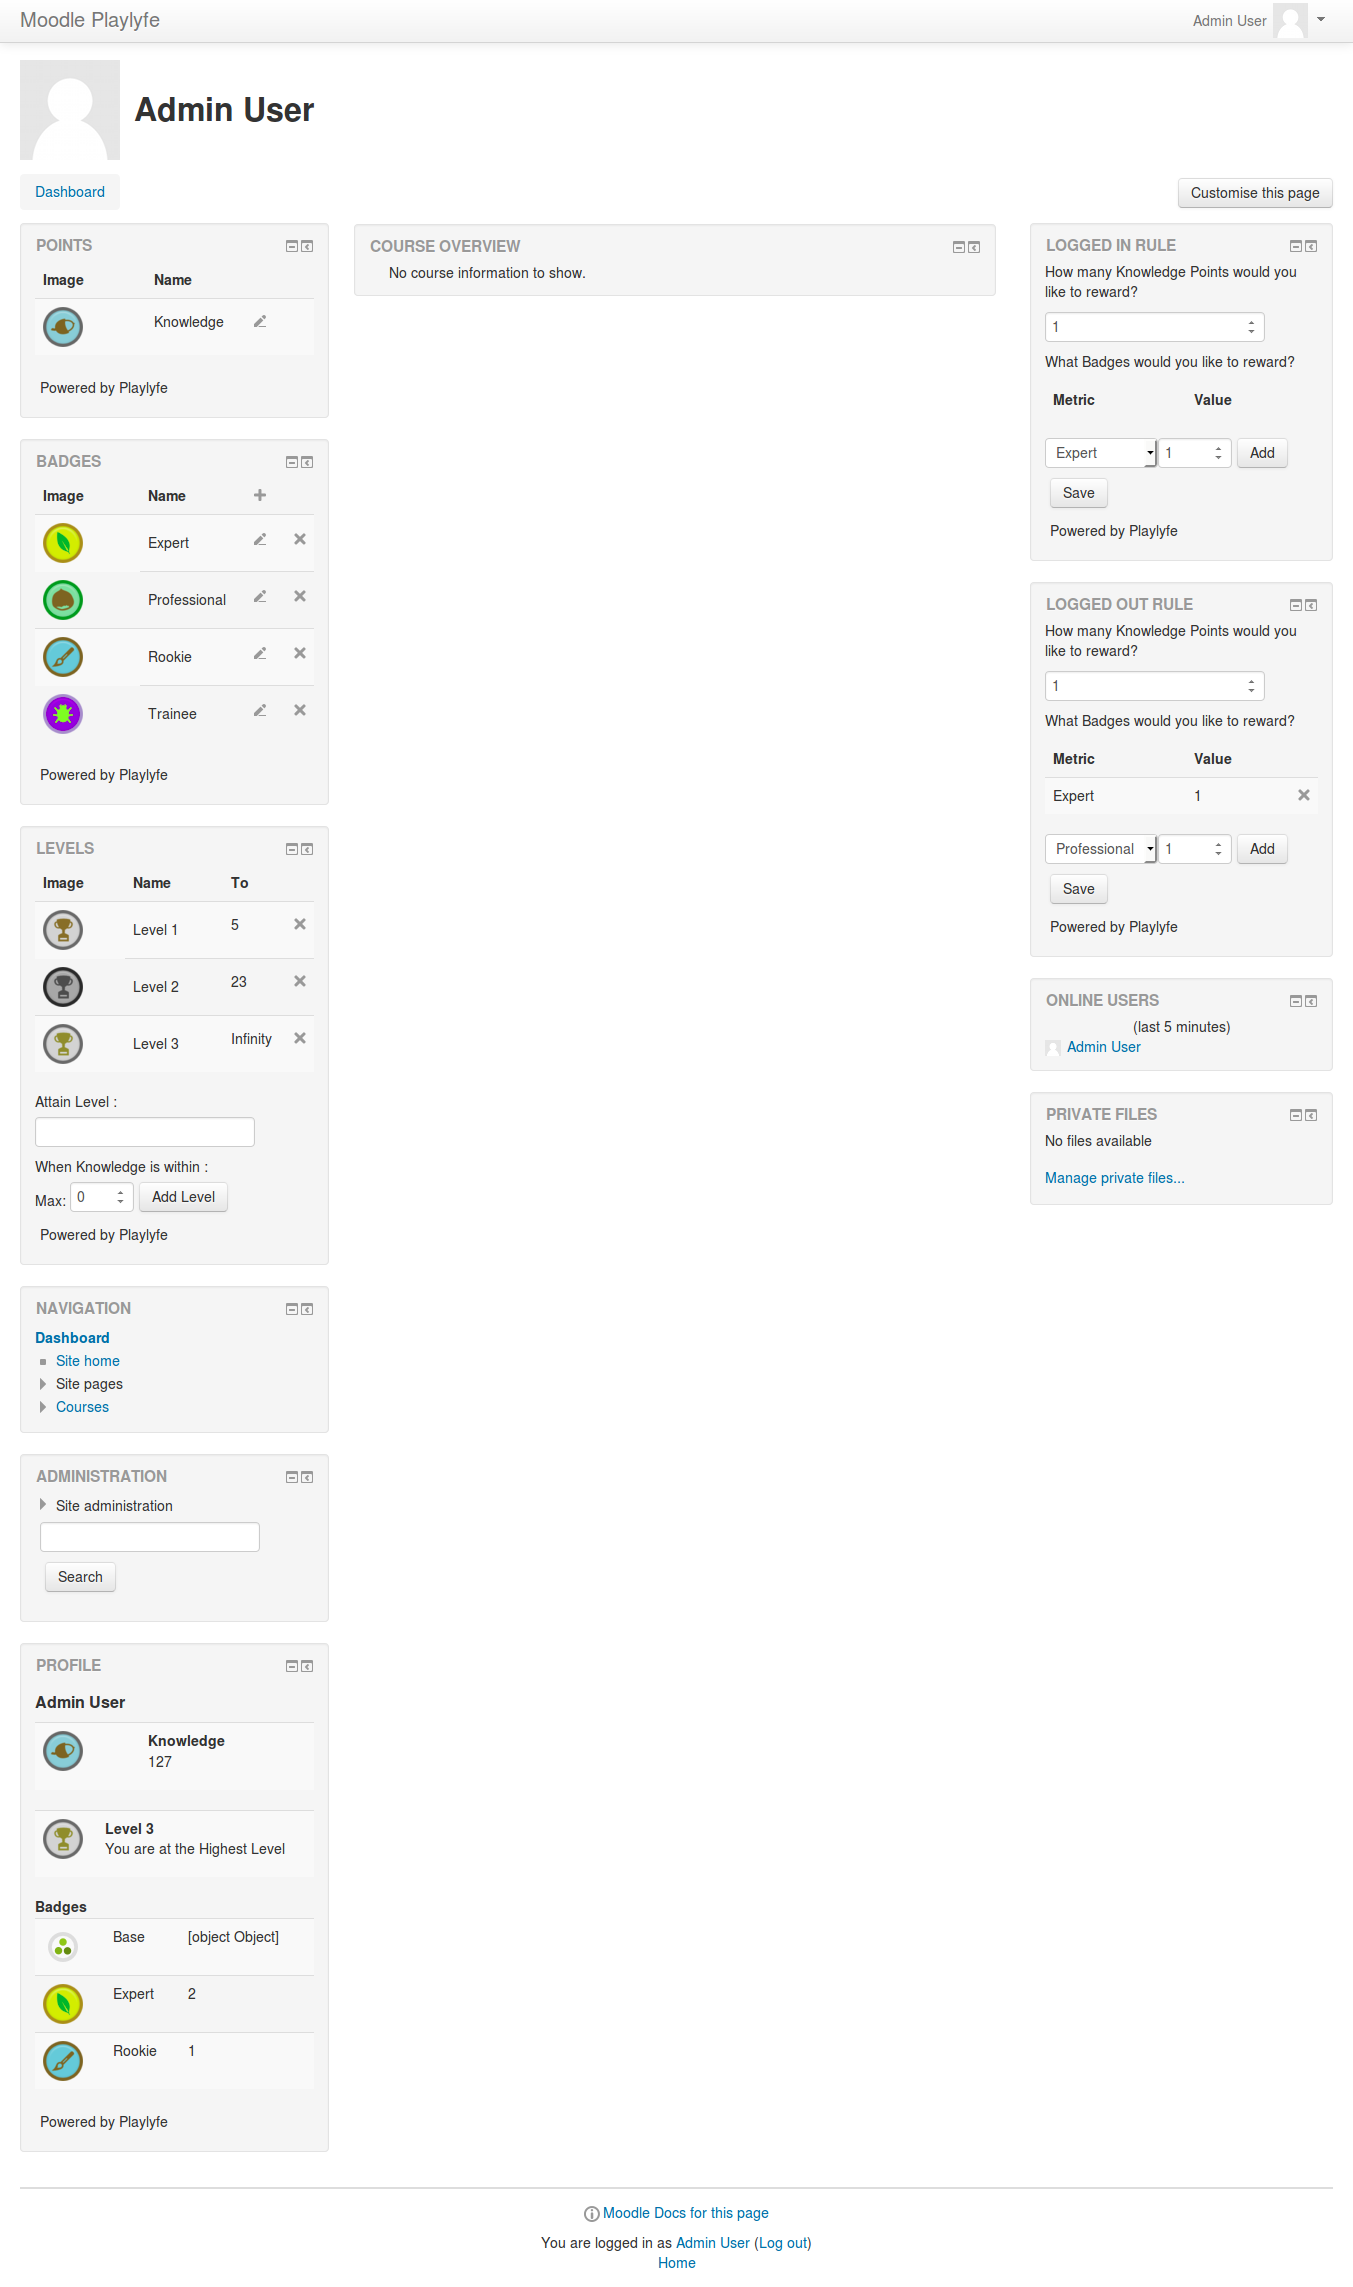
After bumping version and refreshing, you should be able to get rewards on completing a course. Be sure to set the enablecompletion setting otherwise the event is not going to be thrown. This is how the block should look like:
Profile
The user profile will contain all the scores the user has gained within Moodle and what groups he is a part of. Right now we will only display the user's scores. Scores can be points, badges or levels. These can be used later to give rewards to users and also the users will feel a sense of accomplishment which is one of the core drives for gamification.
The route to get the player's profile is:
GET /runtime/players?player_id=userid which returns the player profile in the following format:
{
  "id": "student1",
  "alias": "Johny Jose",
  "created": "2014-06-18T07:52:34.381Z",
  "enabled": true,
  "scores": [
    {
      "metric": {
          "id": "Knowledge",
            "name": "Knowledge",
            "type": "point"
        },
        "value": "40"
    },
    {
      "metric": {
        "id": "level",
        "name": "level",
        "type": "state"
      },
      "value": {
        "name": "Level1"
      },
      "meta": {
        "high": "100",
        "low": "0",
        "next": "Level 2",
        "base_metric": {
          "id": "point",
          "name": "Knowledge"
        }
      }
    }
  ],
  "teams": []
}
Each player will have a scores array which contains all the scores gained. Each score item will contain metric object which contains the metric id, name and type and a value.
If the metric type is point then the value will be an integer.
If it is a state then the value will be an object with key name which will be the state the player is currently in. There will also be meta key if there is a level rule associated with this state metric. This will contain high and low fields which you can use to determine how much more points the player requires to get to the next level and the next field will contain the next level the player can attain. And the base_metric field will contain the point metric the rule is dependant on.
To fetch the player profile through through the SDK, call $pl->get('/runtime/player', array('player_id' => 'student1'));.
To read more about the profile object, check out the Player Profile API.
Note: in every runtime route it is mandatory to pass a
player_idwithout which the query will fail. This query parameter is used to determine on which player's behalf the request is being made. That's why we pass thearray('player_id' => 'student1')in the query param of the request.
Lets modify your edit_form.php file and add a new config type in the $types variable:
$types = array(
  '0' => 'Points',
  '1' => 'Badges',
  '2' => 'Levels',
  '3' => 'Events',
  '4' => 'Profile'
);
and in your block_playlyfe.php, add a new switch case. Also set the global $USER; at the top of your function:
<?php
case 4:
  $this->title = 'Profile';
  if($isadmin) {
    $this->content->text = 'You need to be a student to view the profile';
    return;
  }
  $profile = $pl->get('/runtime/player', array('player_id' => ''.$USER->id));
  $this->content->text = '<div id="pl_profile_block"></div>';
  $this->page->requires->js_init_call('show_profile', array($profile));
To get images for the state metrics, add a new image parameter to the image.php file:
<?php
else if(isset($_GET['metric_id'])) {
  $metric_id = $_GET['metric_id'];
  $query = array('player_id' => ''.$USER->id, 'size' => 'small');
  if(isset($_GET['state'])) {
    $query['state'] = $_GET['state'];
  }
  header('Content-type: image/png');
  // Note: in this route we need the raw response
  echo $pl->get('/runtime/assets/definitions/metrics/'.$metric_id, $query, true);
}
Note that instead of fetching the image from the design, we are fetching it from the assets. The route is runtime/assets/definitions/metrics/:metric_id. This is so that you don't have to worry figuring out the image_id, as we can directly pass the metric_id from the runtime API. If the metric is a state metric, we can also pass the state name to get the state's image.
Now we need to implement the js function show_profile in block_playlyfe.js
/* block_playlyfe.js */
/*
  Displays the user profile
*/
function show_profile(version, profile) {
  $('#pl_profile_block').html(
    '<h5>'+profile.alias+'</h5>' +
    '<table id="pl_profile_point" class="generaltable"><tbody></tbody></table>' +
    '<table id="pl_profile_level" class="generaltable"><tbody></tbody></table>' +
    '<b>Badges</b>' +
    '<table id="pl_profile_badges" class="generaltable">' +
      '<tbody>' +
      '</tbody>' +
    '</table>'
  );
  var point = null;
  for(var i=0;i < profile.scores.length; i++) {
    var score = profile.scores[i];
    if(score.metric.id === 'point') {
      point = score;
      $("#pl_profile_point tbody").append(
        '<tr>' +
          '<td><img src="' + root + '/blocks/playlyfe/image.php?metric_id=point"></td>' +
          '<td style="vertical-align: middle;">' + score.metric.name + ' </b>' +
          '<td  style="vertical-align: middle;">' + score.value + '</td>' +
        '</tr>'
      );
    } else if (score.metric.type === 'state') {
      $("#pl_profile_level tbody").append(
        '<tr style="vertical-align: middle;">' +
          '<td><p><img src="' + root + '/blocks/playlyfe/image.php?metric_id=level&state='+score.value.name+'"></td>' +
          '<td><b>' + score.value.name + '</b><p>' + 'You need ' + (parseInt(score.meta.high) - parseInt(point.value)) + ' ' + score.meta.base_metric.name +' points to get to <b>' + score.meta.next + '</b></p></p></td>' +
        '</tr>'
      );
    } else {
      $('#pl_profile_badges tbody').append(
        '<tr>' +
          '<td><img src="' + root + '/blocks/playlyfe/image.php?metric_id='+score.metric.id+'"></td>' +
          '<td>' + score.metric.name + '</td>' +
          '<td>' + score.value + '</td>' +
        '</tr>'
      );
    }
  }
}
This is how it will look if you have a player called John Doe.
Leaderboard
Leaderboards can be used to show which students are performing really well in all the courses and who are lagging behind. Leaderboards drive competition, especially when there are rewards to the top scorers.
Lets edit the edit_form.php file again and add the new option for leaderboards:
$types = array(
  '0' => 'Points',
  '1' => 'Badges',
  '2' => 'Levels',
  '3' => 'Events',
  '4' => 'Profile',
  '5' => 'Leaderboard'
);
and in your block_playlyfe.php add more cases to the switch case
<?php
  ...
  case 5:
    $this->title = "Leaderboard";
    $leaderboard = $pl->get('/runtime/leaderboards/point', array(
      'player_id' => ''.$USER->id,
      'cycle' => 'alltime',
      'skip' => 0,
      'limit' => 10,
    ));
    $this->content->text = '<div id="pl_leaderboard"></div>';
    $this->page->requires->js_init_call('show_leaderboard', array($leaderboard));
    break;
  ...
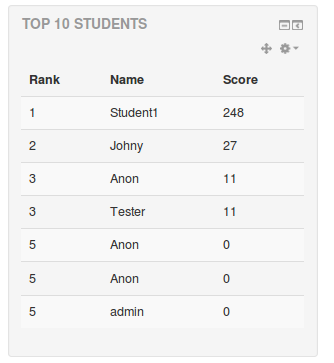
This block will be used to display the Top 10 Students in the LMS for our point metric.
The leaderboard is read using the SDK call made above. To know on what the profile object contains you can checkout the Leaderboard API.
A typical response will look like this:
{
  "data": [
    {
      "player": {
        "id": "admin",
        "alias": "John Doe"
      },
      "score": "15",
      "rank": 3
    }
  ],
  "total": 25
}
To display the leaderboard on the front-end, add to the block_playlyfe.js add the function show_leaderboard
/*
  Displays the point leaderboard
*/
function show_leaderboard(version, leaderboard) {
  var players = '';
  for(var i = 0; i < leaderboard.data.length; i++) {
    var item = leaderboard.data[i];
    players += '<tr><td>' + item.rank + '</td><td>' + item.player.alias + '</td><td>' + item.score + '</td>';
  }
  $('#pl_leaderboard').append(
    '<table class="generaltable">' +
      '<thead>' +
        '<tr>' +
          '<th class="header c1 lastcol centeralign" style="" scope="col">Rank</th>' +
          '<th class="header c1 lastcol centeralign" style="" scope="col">Name</th>' +
          '<th class="header c1 lastcol centeralign" style="" scope="col">Score</th>' +
        '</tr>' +
      '</thead>' +
      '<tbody>' +
        players +
      '</tbody>' +
    '</table>'
  );
}
This is thow the leaderboard will look like:
Now you need to make the Profile block and Leaderboard block display on the student's dashboard and profile page. For this you need go to Site-Administration > Appearance > Default Dashboard Page (or Default Profile Page) and add the Profile and Leaderboard Block there.
Permissions
Now you don't want your students or normal users from changing your block settings, so you'd add a check for the config page. Do this in edit_form.php and add this piece of code on top of your function:
/* edit_form.php */
<?php
protected function specific_definition($mform) {
    global $USER;
    // This is to prevent students from changing config
    if(!has_capability('moodle/site:config', context_user::instance($USER->id))) {
      return;
    }
    ...
}
And in your normal block code you don't want students to be able to see your points, badges blocks etc. For this we are going to add some code to catch that in your block_playlyfe.php
/* block_playlyfe.php */
<?php
public function get_content() {
  global $USER;
  $pl = block_playlyfe_sdk::get_pl();
  $this->content = new stdClass;
  $this->content->footer = 'Powered by Playlyfe';
  $firewall = array(0, 1, 2, 3); // prevent users who don't have site config permission from accessing these type of blocks
  $isadmin = has_capability('moodle/site:config', context_user::instance($USER->id));
  if(in_array($this->config->type, $firewall) && !$isadmin) {
    $this->content->text = "You need to be an admin to use this type of the Playlyfe block";
    return;
  }
  ...
}
This checks if the config type of the block is 0, 1, 2, 3 and whether the user is admin and then only will we allow the user to edit these blocks otherwise we show an access denied message.
Here are some screenshots of the fully built app:
That wraps up this Gamify Moodle tutorial series. Hope this series helps you you approach gamification more directly. In the end, implementing gamification is all about experimenting with new ideas and mechanics and see what sticks with your user-base. So, keep iterating and improving your designs, and keep your students engaged for the better!
Is your head buzzing with ideas now? Then go ahead and put those ideas into action! Try gamifying your own LMS now, and share the experience by tweeting us @playlyfe.