This is the second part of our Gamify Moodle series, which is designed to help you gamify courses on the super-popular learning management system Moodle using Playlyfe.
In our first part, we scratched the surface of gamifying your courses on Moodle. We have already integrated Moodle with Playlyfe using blocks, so let's pick up from there.
As a course designer, you would want is to add gamification elements such as points, badges, levels, and rules to your courses. You'd also want only a few people to access this admin area. To do this, we will create a single block, shown only to teachers and course designers, which will allow them to create new badges and point metrics. And when they are designing courses or quizzes, they can decide the amount of points or types of badges the students will gain on completing those courses or quizzes.
Points, Badges and Levels
Firstly, the teachers should be able to decide for themselves what kind of game mechanics they want for their students. They should also be able to control the names of metrics (Hero Points, Intelligence, Karma, etc.) which would resonate with their students.
To facilitate this, we will create a Points block and a Badges block where the teachers will be able to add new points and badges. These blocks will be only visible to the teachers.
So let's create a block to add more Point metrics to our Moodle. As a bonus, for each new Point metric, we will also create a leaderboard for our students.
Metric Structure
There are 4 types of metrics in Playlyfe: point, set, state and compound. We are only going to be working with point and state for now.
The moodle blocks we create will use the Playlyfe API to create the metrics on the platform too. Any changes you make to the metrics' designs would sync automatically with the platform so that you can always get a consistent design (even if your moodle server is restarted or moved to a different location).
The Playlyfe API follows the RESTful design. All the relevant routes related to the Creation, Reading, Updating and Deletion (CRUD) of metrics are given below:
GET /design/versions/latest/metrics returns a list of all metrics
POST /design/versions/latest/metrics creates a new metric
GET /design/versions/latest/metrics/:metric_id reads a metric with id metric_id
PATCH /design/versions/latest/metrics/:metric_id updates the metric with id metric_id
DELETE /design/versions/latest/metrics/:metric_id deletes the metric with id metric_id
Point Metric structure
{
  "id": "Experience",
  "name": "Experience",
  "type": "point",
  "description": "",
  "constraints": {
    "default": "0",
    "max": "Infinity",
    "min": "0"
  },
  "tags": [],
  "image": "default-point-metric"
}
Here the id key denotes the unique id of the metric and is used for CRUD operations, and for referring to it in other places.
The name field is what is generally displayed to the end user.
The type field is 'point' because we are only going to creating point metrics here, if we were creating sets then the type would be set.
description is some information on what parameter this metric measures
constraints contains the the limits of the metric. The default value is the value with which each student/player starts off with. and the max is the maximum value of that point a student can acquire and min refers to the lowest value he can go to.
The image key is used to fetch the Image for the Point metric from the the image routes.
The tags key is an array in which you can specify tags for the metric and then when you query for the metrics you can filter them by the tag.
Leaderboard structure
Since we're going to create a leaderboard for each point metric created, let's learn a little about how the leaderboards are structured. The leaderboards also have the same RESTful route API as above. The only difference being that you'll have to replace metrics with leaderboards.
{
  "id": "game_leaderboard",
  "name": "My Game Leaderboard",
  "type": "regular",
  "entity_type": "players",
  "description": "The leaderboard tracks my users points",
  "metric": {
    "id": "point",
    "type": "point"
  },
  "scope": {
    "type": "game"
  }
}
Here again id is unique to let you do CRUD operations based on it. name will be the name of the leaderboard. type is right now only regular as the leaderboard for now is only a normal top performers leaderboard. The entity_type refers to whether the leaderboard is for players or teams. The metric id and type is the metric the leaderboard is for. Currently only point metrics are supported. And scope is the scope of the leaderboard whether is is throughout the entire game to track all users or is it only for a particular team etc.
To know more on leaderboard design structure, you can check out Leaderboard Design Structure.
State Metric Structure
{
  "id": "level",
  "name": "level",
  "type": "state",
  "description": "",
  "constraints": {
    "states": [
      {
        "name": "",
        "description": "",
        "image": ""
      }
    ],
  },
  "tags": [],
  "image": "default-state-metric"
}
Most of the parameters for State metrics are also similar to Point metrics. The only significant change is that now the type is changed to state and the constraints now has a key called states which is an array of all the different states a player can be in. Each state has a name, description and image and a player can have only one of these states at a time.
Usually, we can couple these states with Point metrics to create Level rules. These level rules then define discrete levels which a player can achieve as their points increase. A typical scenario will be if a point metric Knowledge is present and there is a state metric Level with the states Beginner, Pro, Advanced.
Level Rule structure The level rule will look something like this:
{
  "id": "level",
  "name": "level",
  "type": "level",
  "base_metric": "Knowledge",
  "level_metric": "Level",
  "levels": [
      {
        "rank": "Beginner",
        "threshold": "5"
      },
      {
        "rank": "Pro",
        "threshold": "300"
      },
      {
        "rank": "Advanced"
      }
  ]
}
So when the player's Knowledge points are less than 5, they will be a Beginner. As their Knowledge increases beyond 5, they move to the Pro level, and on exceeding 300 Knowledge, the Advanced level is reached.
To know more on what each of these fields mean, you can check out Metric Design Structure.
And if you would like to try out these requests directly on Playlyfe you can check out the Metric Design API
Step 1: Configuration
To start the configuration, we use the config_type parameter which we declared in the edit_form.php file. Open that file, and add these items to the $types variable.
/* blocks/playlyfe/edit_form.php */
<?php
...
$types = array('0' => 'Points', '1' => 'Badges', '2' =>'Levels');
...
Now, we can set a block type to be Points, Badges or Levels as shown in the screenshot below:
We can also read the config_type flag in our block code, and determine which metric this block is for — whether it's for Points, Badges or Levels. To give an example, this is how the get_content function in the block will look like:
/* blocks/playlyfe/block_playlyfe.php */
<?php
...
public function get_content() {
  $pl = block_playlyfe_sdk::get_pl();
  $this->content = new stdClass;
  $this->content->footer = 'Powered by Playlyfe';
  switch ($this->config->type) {
    case 0:
      //show point here
      $this->title = 'Points';
      break;
    case 1:
      // show badge list
      $this->title = 'Badges';
      break;
    case 2:
      //show level list
      $this->title = 'Levels';
      break;
  }
  return $this->content;
}
public function get_required_javascript() {
  global $CFG;
  parent::get_required_javascript();
  $this->page->requires->jquery();
  $this->page->requires->jquery_plugin('ui');
  $this->page->requires->jquery_plugin('ui-css');
  $this->page->requires->js('/blocks/playlyfe/block_playlyfe.js');
  $this->page->requires->js_init_call('init_cfg', array(array('root' => $CFG->wwwroot)));
}
...
We are going to be doing the entire CRUD in javascript, which would let you use the goodness of AJAX to let you make changes without reloading the page every single time. For this, we'll now create a javascript file named block_playlyfe.js like so:
/* blocks/playlyfe/block_playlyfe.js */
var root= "";
function init_cfg(version, data) {
  root = data.root;
}
and require it so that we can call its functions in our blocks. Additionally, we call the function init_cfg which exposes our configuration parameters, like web server location, etc., to javascript.
Step 2: Adding Access Control
We want only admins (course designers) and managers (teachers) to be able to create these blocks. For that we need to define our block's access control settings.
Create a new folder db in the plugin folder, and in that create a file access.php and add this code.
/* blocks/playlyfe/db/access.php */
<?php
...
$capabilities = array(
  'block/playlyfe:addinstance' => array(
      'riskbitmask' => RISK_SPAM | RISK_XSS,
      'captype' => 'write',
      'contextlevel' => CONTEXT_BLOCK,
      'archetypes' => array(
          'manager' => CAP_ALLOW,
          'admin' => CAP_ALLOW
      ),
      'clonepermissionsfrom' => 'moodle/site:manageblocks'
  ),
  'block/playlyfe:myaddinstance' => array(
      'captype' => 'write',
      'contextlevel' => CONTEXT_SYSTEM,
      'archetypes' => array(
          'user' => CAP_ALLOW
      ),
      'clonepermissionsfrom' => 'moodle/my:manageblocks'
  )
);
...
As you can see in the code, We define a new user-level capability block/playlyfe:addinstance into our block. This restricts the people who can add this block to a page to only an editingteacher, coursecreator, manager or admin. You can know more about these capabilities at Moodle's Access API
Step 3: Accessing the Playlyfe API
Now, the time has come to start integrating the block with Playlyfe's API to make AJAX requests and do CRUD operations on the metrics or leaderboards. Create a new file at playlyfe/api.php. The single php script which we will be exposing will be:
POST /blocks/playlyfe/api.php?method=?&route=?&body=?
Based on the context, we can make POST requests to Playlyfe for executing certain actions.
/* blocks/playlyfe/api.php */
<?php
require_once(dirname(dirname(dirname(__FILE__))).'/config.php');
require_login();
$can_modify = has_capability('block/playlyfe:addinstance', context_user::instance($USER->id));
$method = $_GET['method'];
$route = $_GET['route'];
if(stripos($route, '/design') === 0 && !$can_modify) {
  echo 'You need to be authorized to make this request';
}
else if(stripos($route, '/admin') === 0 && !$can_modify) {
  echo 'You need to be authorized to make this request';
}
else {
  header('Content-Type: application/json');
  try {
    $data = json_decode(file_get_contents('php://input'), false);
    $pl = block_playlyfe_sdk::get_pl();
    echo json_encode($pl->api($method, $route, array(), $data)); // this is to make the request
    $pl->post('/design/versions/latest/deploy'); //this is to deploy whatever changes were made in your design
  }
  catch(Exception $e) {
    http_response_code(400);
    echo json_encode($e);
  }
}
Now, we can make AJAX requests to Playlyfe from within our blocks without a page reload.
- To make an actual API request, the user must be logged in first (notice the
require_login()check). - Then we check whether the user has the capability to make the request (
'block/playlyfe:addinstance'). If the user tries to use any of the/designor/adminroutes from Playlyfe without this capablility, it returns an error. Only authorized users are allowed to access the design and admin routes.
We get the method of the request from the query string and also the route of the request. Then if the request has a JSON (JavaScript Object Notation) body we read it and make a request to Playlyfe and then convert the result to JSON and send it back to the frontend. If there was an error in the request, then we set a status 400 and send the JSON-ified error object.
Now in our block_playlyfe.js file add this function,
/* blocks/playlyfe/block_playlyfe.js */
/*
  This makes an ajax request to the Playlyfe API through api.php
  @param method the http method of the request can be 'GET', 'POST', 'PATCH', 'DELETE'
  @param route The playlyfe API route you would like to make the request to
  @param body If it a POST or PATCH request the body should be present
*/
function makeApi(method, route, body) {
  body =  body || {};
  return $.ajax({
    type: 'POST',
    url: root+'/blocks/playlyfe/api.php?method='+method+'&route='+route,
    dataType: 'json',
    contentType : 'application/json',
    data: JSON.stringify(body)
  })
  .fail(function (err) {
    console.log(err.responseText);
    err = JSON.parse(err.responseText);
    alert(err.message);
  });
}
This function will allow to to make API requests and will automatically catch all errors and display them. A typical AJAX request from the frontend will look something like this:
/* blocks/playlyfe/block_playlyfe.js */
makeAPI('POST', '/design/latest/versions/metrics', {
  "id": "Experience",
  "name": "Experience",
  "type": "point",
  "constraints": {
    "default": "0",
    "max": "Infinity",
    "min": "0"
  },
  "tags": [],
  "image": "default-point-metric"
});
This will make a post request to Playlyfe to create a metric with id and name Experience on Playlyfe.
Step 4: Adding Images
The image routes which we will be using are:
GET /design/images/:image_id returns image with id image_id
POST /design/images uploads a new image and returns the image_id
These functions are already implemented in pl->readimage() and pl->uploadimage() which you can investigate to know more.
We also need to add another route which will allow us to fetch images for our metrics. Create a file called image.php in the playlyfe folder with this content:
/* blocks/playlyfe/image.php */
<?php
require_once(dirname(dirname(dirname(__FILE__))).'/config.php');
require_login();
$pl = block_playlyfe_sdk::get_pl();
if(!isset($_GET['image_id'])) { // This is for uploading an image to playlyfe and updating the corresponding metric
  if (empty($_FILES) || $_FILES["file"]["error"]) {
    die('{"OK": 0}');
  }
  $image_id = $pl->upload_image($_FILES['file']['tmp_name']);
  $metric_id = $_GET['id'];
  $metric_type = $_GET['type'];
  $name = $_GET['name'];
  if($metric_type == 'point') { // update the image of the point metric
    $pl->patch('/design/versions/latest/metrics/'.$metric_id, array(), array('type' => 'point', 'image' => $image_id));
  }
  else { // update the image of the state in the state metric
    $level = $pl->get('/design/versions/latest/metrics/'.$metric_id);
    for($i=0;$i<count($level['constraints']['states']);$i++) {
      if($level['constraints']['states'][$i]['name'] == $name) {
        $level['constraints']['states'][$i]['image'] = $image_id;
        break;
      }
    }
    $pl->patch('/design/versions/latest/metrics/'.$metric_id, array(), array(
      'type' => 'state',
      'constraints' => $level['constraints']
    ));
  }
  die(json_encode(array('image_id' => $image_id)));
}
else {
  // Get the image of the point or state based on the image_id
  $image_id = $_GET['image_id'];
  unset($_GET['image_id']);
  header('Content-type: image/png');
  echo $pl->read_image($image_id, $_GET);
}
To read an image from Playlyfe, you can pass the image src like this:
<img src="/blocks/playlyfe/image.php?image_id=$image_id"></img>
To update the metric with this newly uploaded image, you need to add a function:
/* blocks/playlyfe/block_playlyfe.js */
/*
  This makes an ajax request to our image upload file and uploads it and returns them image_id in callback
  @param div the div to listen to to display the upload form
  @param type the type of metric being uploaded `point`, `state`
  @param id the id of the metric being uploaded
  @param name optional the name of the state of the state metric being uploaded
  @param cb the callback to trigger when the image is uploaded
*/
function makeUploader(div, type, id, name, cb) {
  var uploader = new plupload.Uploader({
    runtimes : 'html5,',
    browse_button: div, // this can be an id of a DOM element or the DOM element itself
    url: root+'/blocks/playlyfe/image.php?type='+type+'&id='+id+'&name='+name
  });
  uploader.init();
  uploader.bind('FilesAdded', function(up, files) {
    uploader.start();
  });
  uploader.bind('FileUploaded', function(up, file, obj) {
    var response = JSON.parse(obj.response);
    cb(response.image_id);
  });
}
We are using the awesome plupload plugin for uploading images, which you can download from here. You can require the plUpload plugin in the requires block in the get_required_javascript method in the block_playlyfe.php file:
/* blocks/playlyfe/block_playlyfe.php */
<?php
...
$this->page->requires->js('/blocks/playlyfe/js/plupload.full.min.js');
...
Step 5: Defining Points
What we are going to do now is to check what type the block is configured as whether it is a points block or a badges block and display what needs to be displayed as required. We do this in the get_content function under case 0 of the switch.
/* blocks/playlyfe/block_playlyfe.php */
<?php
public function get_content() {
  ...
  switch ($this->config->type) {
    case 0:
      $this->title = 'Points';
      try {
        $point = $pl->get('/design/versions/latest/metrics/point');
      }
      catch(Exception $e) {
        if($e->name == 'metric_not_found') {
          $point = $pl->post('/design/versions/latest/metrics', array(), array(
            'id' => 'point',
            'name' => 'point',
            'type' => 'point',
            'constraints' => array(
              'default' => '0',
              'max' => 'Infinity',
              'min' => '0'
            )
          ));
          $pl->post('/design/versions/latest/leaderboards', array(), array(
            'id' => 'point',
            'name' => 'point',
            'type' => 'regular',
            'description' => '',
            'entity_type' => 'players',
            'scope' => array(
               'type' => 'game'
            ),
            'metric' => array(
              'id' => 'point',
              'type' => 'point'
            )
         ));
        } else {
          throw $e;
        }
      }
      $this->content->text = '<div id="pl_point_block"></div>';
      $this->page->requires->js_init_call('init_point_block', array($point));
      break;
  }
  ...
}
The type of the block is gotten from $this->config->type. 0 means Points. Right now, we will allow the admin to be able to create only a single Point metric, but the name and image can be changed if desired. What we do is we try to get a metric from Playlyfe with the id point. If the metric does not exist then it will throw an exception. A metric_not_found exception would mean that the point metric doesn't exist on Playlyfe, so we'd have to create one. After we get the Point metric info, we insert a div into our block content and then call the javascript function init_point_block with our point data as a parameter.
/* blocks/playlyfe/block_playlyfe.js */
// Displays the point metric in the block
function init_point_block(version, point) {
  $('#pl_point_block').html(
    '<table class="generaltable">' +
      '<thead>' +
        '<tr>' +
          '<th class="header c1 lastcol centeralign">Image</th>' +
          '<th class="header c1 lastcol centeralign">' +
            '<div style="position: relative;">' +
              'Name' +
            '</div>' +
            '</th>' +
        '</tr>'+
      '</thead>' +
      '<tbody>' +
        '<tr>' +
          '<td>' +
            '<img id="point_image" src="' + root + '/blocks/playlyfe/image.php?image_id='+point.image+'&size=small">' +
          '</td>' +
          '<td style="vertical-align: middle;">' +
            '<div style="position: relative;">' +
              '<p id="point_name">'+point.name+'</p>' +
              '<img style="position: absolute;right: 40px;bottom: 5px;" src="http://localhost:3000/theme/image.php/clean/core/1432795487/t/editstring" id="point_edit">' +
            '</div>' +
            '</td>' +
        '</tr>'+
      '</tbody>' +
    '</table>'
  );
  $('#point_edit').click(function(event) {
    var name = prompt('Enter the Point Name', point.name);
    if(name === null) {
      return;
    }
    if (name !== '' && name.length > 2) {
      makeApi('PATCH','/design/versions/latest/metrics/point', {
        type: 'point',
        name: name
      })
      .done(function() {
        $('#point_name').text(name);
        point.name = name;
      });
    }
    else {
      alert('Please Enter a Proper Name for the Point Metric');
    }
  });
  makeUploader('point_image', 'point', 'point', '', function(image_id) {
    $('#point_image').attr("src", root + '/blocks/playlyfe/image.php?image_id='+image_id+'&size=small');
  });
}
This function reads the Point metric's info, renders it and allows us to edit the Point's name using the Edit button which is displayed on the right side. While editing, a modal opens and asks for the new name.
This is how the Point block will look like:
Step 6: Adding Badges
Now we going to add a Badges list in our block. We do this in the get_content function under case 1 of the switch. (As you can guess, 1 corresponds to Badge). We first fetch all the metrics on Playlyfe which have the tag badge. Then we call our javascript function init_badge_list with that data. The rendering of the badges is done by that function.
/* blocks/playlyfe/block_playlyfe.php */
<?php
public function get_content() {
  ...
  switch ($this->config->type) {
    case 1:
      $this->title = 'Badges';
        $badges = $pl->get('/design/versions/latest/metrics',  array('fields' => 'id,name,description,type,image', 'tags' => 'badge'));
        $this->content->text = '<div id="pl_badge_block"></div>';
        $this->page->requires->js_init_call('init_badge_list', array($badges));
        break;
  }
  ...
}
So we will create a new javascript Class called BadgeList which will list all badges in a table and allow them to be edited and deleted.
And our init_badge_list function will create a new Badge list.
/* blocks/playlyfe/block_playlyfe.js */
// Creates a badge list in the block
function init_badge_list(version, badges) {
  new BadgeList(badges);
}
function BadgeList(badges) {
  this.$el = $('#pl_badge_block');
  this.badges = badges; // the badges collection will hold all our badges
  this.render();
  var self = this;
  this.$el.find('#add_badge').click(function(event) {
    var name = prompt('Enter the Badge Name', "");
    if(name === null) {
      return;
    }
    if (name !== '' && name.length > 2) {
      self.create(name);
    }
    else {
      alert('Please Enter a Proper Name');
    }
  });
}
// Renders the metric list as table with all items and also creates an add button and text
BadgeList.prototype.render = function() {
  var self = this;
  html =
  '<table class="generaltable">' +
    '<thead>' +
      '<tr>' +
        '<th class="header c1 lastcol centeralign">Image</th>' +
        '<th class="header c1 lastcol centeralign">' +
          '<div style="position: relative;">' +
            'Name' +
            '<img style="position: absolute;right: 40px;bottom: 5px;" src="http://localhost:3000/theme/image.php/clean/core/1432795487/t/add" id="add_badge">' +
          '</div>' +
          '</th>' +
      '</tr>'+
    '</thead>' +
    '<tbody>' +
    '</tbody>' +
  '</table>';
  self.$el.html(html);
  for(var i=0; i < this.badges.length; i++) {
    (function(badge) {
      self.$el.find('table tbody').append(
        '<tr>' +
          '<td>' +
            '<img id="'+badge.id+'_image" src="' + root + '/blocks/playlyfe/image.php?image_id='+ badge.image + '&size=small">' +
          '</td>' +
          '<td style="vertical-align: middle;">' +
            '<div style="position: relative;">' + badge.name +
              '<img style="position: absolute;right: 40px;" src="http://localhost:3000/theme/image.php/clean/core/1432795487/t/editstring" id="'+badge.id+'_edit">' +
              '<img style="position: absolute;right: 0px;" src="http://localhost:3000/theme/image.php/clean/core/1432795487/t/delete" id="'+badge.id+'_delete">' +
            '</div>' +
          '</td>' +
        '</tr>'
      );
      self.$el.find('#'+badge.id+'_edit').click(function(){
        self.update(badge);
      });
      self.$el.find('#'+badge.id+'_delete').click(function(){
        self.remove(badge);
      });
      makeUploader(
        badge.id+'_image',
        'point',
        badge.id,
        '',
        function(image_id) {
          self.getBadge(badge.id).image = image_id;
          self.render();
        }
      );
    })(this.badges[i]);
  }
}
// This gets a badge from the badge collection when given the badge id
BadgeList.prototype.getBadge = function(id) {
  for(var i=0; i < this.badges.length; i++) {
    if(this.badges[i].id === id) {
      return this.badges[i];
    }
  }
}
We iterate over all the badges and add them one by one into the list. Now add these function to the prototype to perform CRUD operations on the metric.
1. Creating a new metric Create a new badge by making a POST request, and then add the metric to the list:
/* blocks/playlyfe/block_playlyfe.js */
// Create a new badge by making an post request and then adds it to this list
BadgeList.prototype.create = function(name) {
  var self = this;
  makeApi('POST', '/design/versions/latest/metrics', {
    id: name,
    name: name,
    type: 'point',
    constraints: {
      'default': '0',
      'max': 'Infinity',
      'min': '0'
    },
    'tags': ['badge']
  })
  .done(function (data) {
    self.badges.push(data);
    self.render();
  });
}
2. Updating a metric Updates a badge by making a PATCH request to the Playlyfe servers:
/* blocks/playlyfe/block_playlyfe.js */
// Updates a badge by making a patch request
BadgeList.prototype.update = function(badge) {
  var self = this;
  var new_name = prompt("Enter the new name", badge.name);
  if (new_name !== null && new_name !== '' && new_name.length > 2 && new_name !== badge.name) {
    makeApi('PATCH','/design/versions/latest/metrics/'+badge.id, {
      type: 'point',
      name: new_name
    })
    .done(function() {
      self.getBadge(badge.id).name = new_name;
      self.render();
    });
  }
}
3. Removing a metric Removes a badge by making a DELETE request and removing it from the list.
/* blocks/playlyfe/block_playlyfe.js */
// Removes a badge by making a delete request and removes it from the list
BadgeList.prototype.remove = function(badge) {
  var self = this;
  var result = confirm("Do you really want to delete "+badge.name + '?');
  if(result) {
    makeApi('DELETE', '/design/versions/latest/metrics/'+badge.id)
    .done(function (data) {
      for(var i=0; i < self.badges.length; i++) {
        if(self.badges[i].id === badge.id) {
          self.badges.splice(i, 1);
        }
      }
      self.render();
    });
  }
}
Now, when a teacher wants to add a new badge to the game, they'll only have to click on the Add button on the right. A modal will appear asking for the name of the badge, which then creates a Point metric with the tag badge.
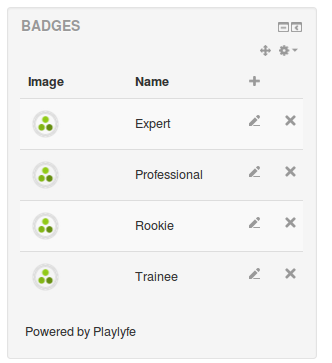
Finally, the Badge block would look something like this:
Step 7: Adding Levels
Now we going to add levels list in our Block. We do this in the get_content function under case 2 of the switch. We first get our state metric with id level from Playlyfe. If it doesn't exist then we create it. For a valid levelling system, we need to have atleast 1 state in our state metric. So, lets create a metric with 2 states called none1 and none2. Then we call our javascript function init_level_list with that data. Then we check if the level_rule level exists. If it doesn't exist then we create one. Again we cannot have a level rule with empty levels. So we create 2 default levels that a user can attain. The first rank he can attain is none1 which is reached if his score is between 0 and 5. If he crosses 5 he will attain the level none2. The thresholds are supplied by the Point metric with id point. The level rule triggers whenever there are changes in this Point metric.
/* blocks/playlyfe/block_playlyfe.php */
<?php
case 2:
  $this->title = 'Levels';
  try {
    $base = $pl->get('/design/versions/latest/metrics/point');
    $state = $pl->get('/design/versions/latest/metrics/level');
    $level_rule = $pl->get('/design/versions/latest/rules/level');
  }
  catch(Exception $e) {
    if($e->name == 'metric_not_found') {
      $state = $pl->post('/design/versions/latest/metrics', array(), array(
        'id' => 'level',
        'name' => 'level',
        'type' => 'state',
        'image' => 'default-state-metric',
        'constraints' => array(
          'states' => array(
            array('name' => 'none1', 'image' => 'default-state-metric'),
            array('name' => 'none2', 'image' => 'default-state-metric')
          )
        )
      ));
    } else if($e->name == 'rule_not_found') {
      $level_rule = $pl->post('/design/versions/latest/rules', array(), array(
        'id' => 'level',
        'name' => 'level',
        'type' => 'level',
        'level_metric' => 'level',
        'base_metric' => 'point',
        'levels' => array(
          array('rank' => 'none1', 'threshold' => '5'),
          array('rank' => 'none2')
        )
      ));
    } else {
      throw $e;
    }
  }
  $this->content->text = '<div id="pl_level_block"></div>';
  $this->page->requires->js_init_call('init_level_list', array(array('state' => $state, 'base' => $base, 'rule' => $level_rule)));
  break;
This is the javascript function to create the level list:
/* blocks/playlyfe/block_playlyfe.js */
// Creates a new LevelList Object
function LevelList(data) {
  this.$el = $('#pl_level_block');
  this.names = {};
  // This is used to index states by name later for lookup
  for(var i=0; i < data.state.constraints.states.length; i++) {
    var state = data.state.constraints.states[i];
    this.names[state.name] = state;
  }
  this.rule = data.rule;
  this.base = data.base.name;
  this.stack = [];
  this.render();
}
// Renders the metric list as table with all items and also creates an add button and text
LevelList.prototype.render = function() {
  var self = this;
  html =
  '<table class="generaltable">' +
    '<thead>' +
      '<tr>' +
        '<th class="header c1 lastcol centeralign" style="" scope="col">Image</th>' +
        '<th class="header c1 lastcol centeralign" style="" scope="col">Name</th>' +
        '<th class="header c1 lastcol centeralign" style="" scope="col">To</th>' +
      '</tr>'+
    '</thead>' +
    '<tbody>' +
    '</tbody>' +
  '</table>' +
  '<label for="level_name">Attain Level : </label>'+
  '<input id="level_name" type="text"></input>' +
  '<label for="level_to">When '+this.base+' is within : </label>' +
  'Max: <input id="level_to" type="number" value="0" style="width: 50px;">' +
  '<button id="add_level">Add Level</button>';
  this.$el.html(html);
  $('#add_level').click(function(event) {
    var name = $('#level_name').val();
    $('#level_name').val('');
    var to = $('#level_to').val();
    if(name) {
      if (name !== '' && name.length > 2) {
        self.create(name, to);
      }
      else {
        alert('Please Enter a Proper Name');
      }
    }
  });
  var self = this;
  for(var i=0; i < this.rule.levels.length; i++) {
    (function(level) {
      var rank = level.rank;
      self.$el.find('table tbody').append(
        '<tr>' +
          '<td>' +
            '<img id="level_'+rank+'" src="' + root + '/blocks/playlyfe/image.php?image_id='+ self.names[rank].image + '&size=small">' +
          '</td>' +
          '<td style="vertical-align: middle;">' +
            rank +
          '</td>' +
          '<td style="vertical-align: middle;">' +
            '<div style="position: relative;">'+
              '<p>' + (level.threshold || 'Infinity') + '</p>' +
              '<img style="position: absolute;right: 0px;bottom: 5px;" src="http://localhost:3000/theme/image.php/clean/core/1432795487/t/delete" id="'+rank+'_delete">' +
            '</div>' +
          '</td>' +
        '</tr>'
      );
      makeUploader('level_'+rank, 'state', 'level', rank, function(image_id) {
        self.names[rank].image = image_id;
        self.render();
      });
      // We check if atleast 2 levels are present. If not then we throw an alert message.
      // And then we remove that particular level from both the state metric and level rule and do the save
      $('#'+rank+'_delete').click(function(){
        if(self.rule.levels.length <= 2) {
          alert('You need to have atleast minimum 2 levels');
          return;
        }
        var result = confirm("Do you really want to delete  the Level `"+ rank + '`?');
        if(result) {
          delete self.names[rank];// remove from the state metric
          for(var i=0; i < self.rule.levels.length; i++) {
            level = self.rule.levels[i];
            if(rank === level.rank) {
              self.rule.levels.splice(i, 1); // remove from the levels
              break;
            }
          }
          self.save();
        }
      });
    })(this.rule.levels[i]);
  }
}
1. Creating a Level Here we check for a duplicate level name and throw an alert message. And we check for the 2nd last value in the levels and make sure that the new value is always greater that so that his levels are linearly increasing. Then we update the new values and add the new level to the state metric and the level rule then call the save.
/* blocks/playlyfe/block_playlyfe.js */
LevelList.prototype.create = function(name, value) {
  if(this.names[name]) { // Don't create levels with same name
    alert('You have already defined a level with this name');
    return;
  }
  // Don't create levels with lower score than previous one
  var prev_value = parseInt(this.rule.levels[this.rule.levels.length-2].threshold);
  if(prev_value > value) {
    alert('You need to pass a higher value than the 2nd last level');
    return;
  }
  var self = this;
  var last = this.rule.levels.pop();
  last.threshold = value; // change threshold of last level
  this.rule.levels.push(last);
  this.rule.levels.push({rank: name }); // add the new level
  self.names[name] =  {  // add the new state
    name: name,
    image: 'default-state-metric'
  };
  this.save();
}
2. Saving the Level Rule and State Metric The following code would enable admins to save the changes in the state metric and the Level rule.
/* blocks/playlyfe/block_playlyfe.js */
LevelList.prototype.save = function() {
  var self = this;
  new_states = [];
  for(var name in this.names){
    new_states.push({
      name: name,
      image: this.names[name].image
    });
  }
  makeApi('PATCH', '/design/versions/latest/metrics/level', {
    type: 'state',
    constraints: {
      'states': new_states
    }
  })
  .done(function() {
    makeApi('PATCH', '/design/versions/latest/rules/level', {
      type: 'level',
      levels: self.rule.levels
    })
    .done(function() {
      self.render()
    });
  });
}
And this is how Level block will look like:
That's it! We're done with setting up the point and levelling systems in our Moodle installation.
What's Next?
In the third part, we are going to learn on how to create custom rules on Playlyfe. We'll also learn how to create players on Playlyfe for every new user who signs up on your Moodle LMS.
So check back later for the third and final part of this blog, and future awesomeness, or follow us on twitter at @playlyfe.
See you next time!