In this 3-part tutorial series, we show you how to gamify courses on your Moodle installation. We will use Playlyfe for the gamification features.
First off, let's give you a short intro on Moodle LMS and a look on its architecture and then we will get into integrating Moodle with Playlyfe. You'll need have some knowledge of PHP and Javascript to understand the code I'll be sharing here.
About Moodle
Moodle is a learning platform designed to provide educators, administrators and learners with a single robust, secure and integrated system to create personalised learning environments. Available in over 100 languages, Moodle is trusted by organisations and institutions, large and small, with millions of users all over the world. Moodle is provided freely as Open Source software, under the GNU General Public License. Anyone can adapt, extend or modify Moodle for both commercial and non-commercial projects without any licensing fees and benefit from the cost-efficiencies, flexibility and other advantages of using Moodle.
Since this is a technical blog post, I'm going to go a bit deep on how moodle works and how to create plugins to integrate with it.
Moodle's Plugin System
Moodle allows users to integrate their platforms and APIs using plugins just like Wordpress. Based on how you would like to modify moodle, there are different types of plugins. The recommended way to add new functionality to Moodle is to create a new standard plugin (module, block, auth, enrol). Here we are going to use one of these plugins: the Block.
Installation
To get started you need to setup moodle on your system if you don't already have it. You can check out the docker-moodle project. The project has step-by-step guide to get moodle up and running on your system easily.
Setup
Before starting to work on the plugin, you need to create a game on Playlyfe. So head over to Playlyfe.
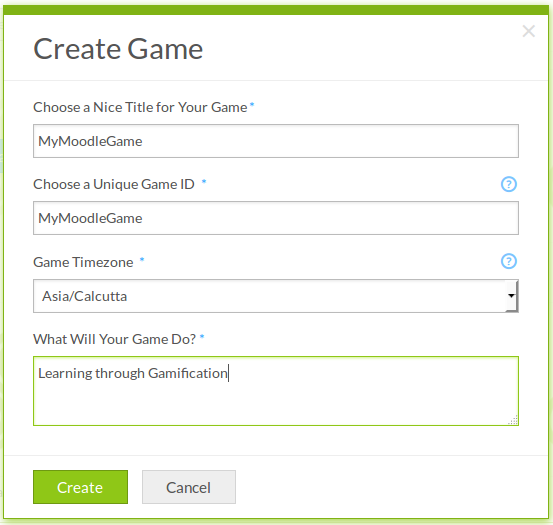
1. Create a new game
A game is a simple gamified system having the actions you want to attach rewards to, and the points or badges you want to award.
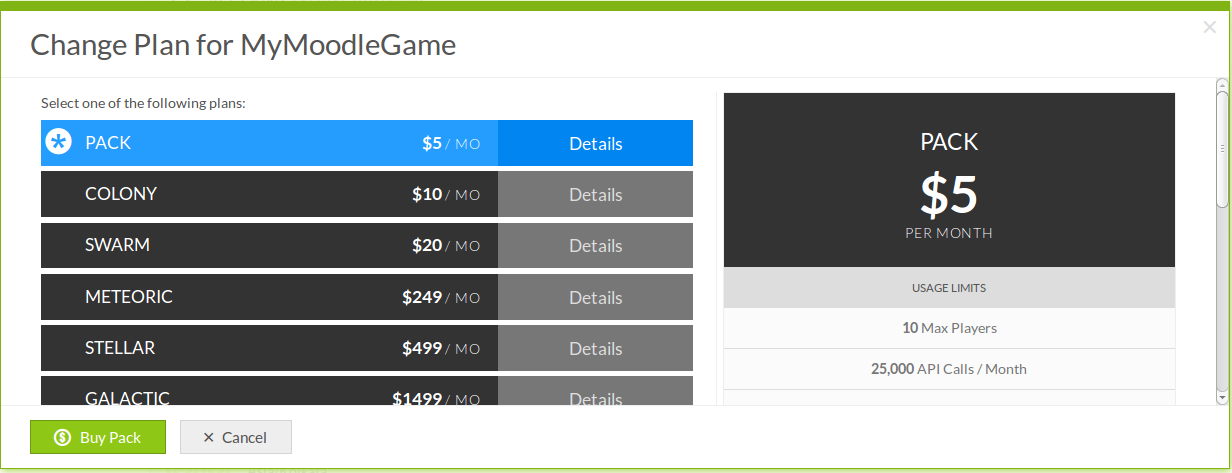
2. Update your game's subscription
When you signup on Playlyfe, you get $20 credited into your wallet. This helps you get started with your integration without spending money from your pocket initially.
Let's change the game's plan to the Pack plan so that you get make API calls to access the game.
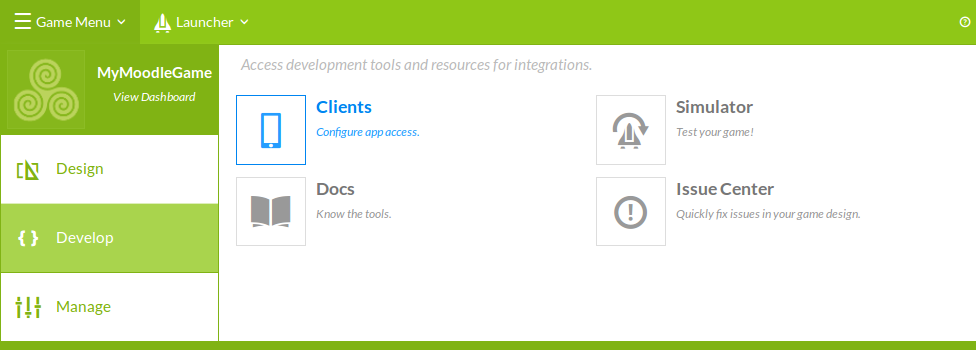
3. Create a Client
Your app needs a client, which will allow your app to use the Playlyfe REST API.
Go to Game Menu > Develop > Clients.
There are four type of clients Playlyfe provides, but I'll not delve into that right now.
This client will be making API calls from the moodle backend (PHP) and the login system will also be what moodle already offers, so we will
tick those choices, and a Client will be created which authorizes using the Client Credential Flow.
We will also be using this client to first test our game design and integration using fake players, so check the Is this a Simulation Client checkbox.
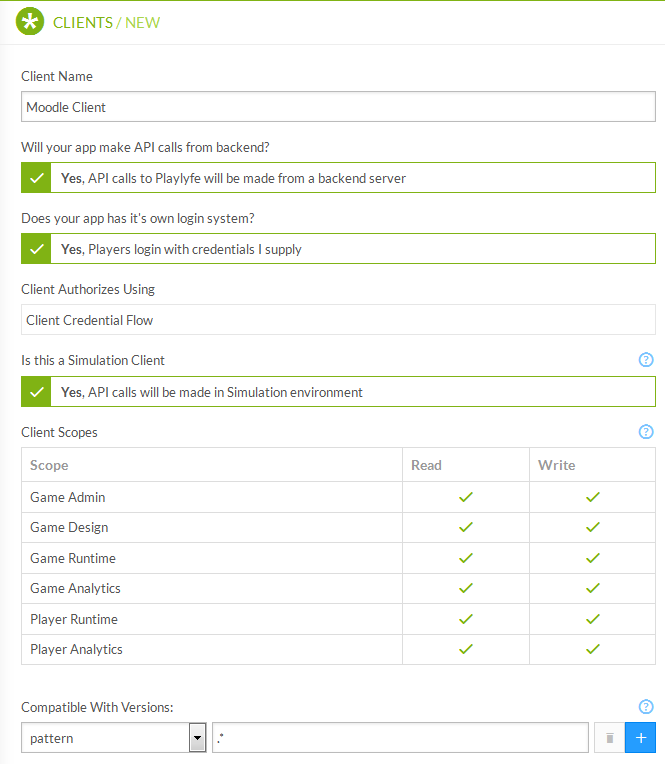
After you've created the client, note down the client_id and client_secret. You will be needing it for the next step.
The Playlyfe Block Plugin
We are going to be adding all our gamification functinality like creating points, badges, rules, leaderboards into a single block plugin called the Playlyfe Block. Admins will use this block to configure the gamification settings on their Moodle. They can create any number of these Block instances and put it on whatever page they like with their own permissions and access control. Admins can also configure the block to show any component, such as the player profile, or the 'top students' leaderboard, etc.
Now, we are going to start from scratch on designing the Block. We will mainly be using javascript and jquery for rendering the contents on the block and making ajax requests to the Playlyfe API.
Step 1 - Bootstrap the plugin
Create a new folder in your moodle src directory under the folder blocks called playlyfe. Every Plugin needs a version file which tells moodle the plugin version, name and the minimum required moodle version. Add a version.php file in it which contains this data:
/* version.php */
<?php
$plugin->version = 2015052812;
$plugin->requires = 2013051409.00;
$plugin->component = 'block_playlyfe;
Step 2 - Create your first block
Create another file called block_playlyfe.php which is the main entry point to our plugin with this content.
/* block_playlyfe.php */
<?php
class block_playlyfe extends block_base {
  public function init() {
    $this->title = 'Playlyfe'; // This is the Block name
  }
  /* This will return all text content which will be displayed in the blocks */
  /* This is where we are going to integrate our Game using the Playlyfe REST API */
  public function get_content() {
    $this->content = new stdClass;
    $this->content->text = "Testing Plugin";
    return $this->content;
  }
  /* all the required javascript for our block */
  public function get_required_javascript() {
    parent::get_required_javascript();
    $this->page->requires->jquery();
    $this->page->requires->jquery_plugin('ui');
    $this->page->requires->jquery_plugin('ui-css');
  }
  /* Each of our block instance has some configuration parameters */
  public function has_config() {
    return true;
  }
  /* Users can create multiple Block instances */
  public function instance_allow_multiple() {
    return true;
  }
  /* Allow this block to be added on any page */
  public function applicable_formats() {
    return array(
      'all' => true,
      'admin' => true,
      'site-index' => true,
      'course-view' => true,
      'mod' => true,
      'my' => true
    );
  }
}
This code creates a raw Block with some initial configuration parameters set.
Step 3 - Add settings to modify the block
Now we need to add the settings page for our Block so that users can change the Block's title and choose what type of Block it is going to be and some other parameters which we will add later.
Create a file edit_form.php in the playlyfe block folder and put this into it,
/* edit_form.php */
<?php
class block_playlyfe_edit_form extends block_edit_form {
  protected function specific_definition($mform) {
    $types = array();
    $mform->addElement('select', 'config_type', 'Type', $types);
    $mform->setDefault('config_type', 0);
  }
}
Each Playlyfe Block Instance has the setting config_type. The config_type setting will be used later in the post. Read on...
Step 4 - Testing the plugin
Now you should refresh you page and you will see a Plugin installation page where your new playlyfe_block has been registered.
You need to click on Upgrade moodle Database.
After that go to your Dashboard Page click on the Customize this page button on the top right side.
Finally, to add a Playlyfe block to this page, Click on the Add a Block button on the bottom left side.
Its done. So now you can click on the settings button and go to the configuration page and you can see the settings we defined.
Step 5 - Setting up comms to Playlyfe Servers
Now you need to include the Playlyfe SDK in the Plugin. Create a new file sdk.php in a new folder called classes in the playlyfe folder with this content. And replace the client_id and client_secret with your client id and secret which you had noted above.
So here we need to initialize the SDK. To know more about how the SDK works you can go to the Playlyfe PHP SDK.
To initialize it we need to pass the client_id and client_secret.
In the Playlyfe SDK we use the OAuth 2.0 Client Credentials Flow to make request to the Playlyfe API which returns an access_token. We need to persist or save this access token once we get it so we pass store and load functions which basically store the access_token and the expires_at time in the moodle config database using the set_config() and get_config() functions.
/* classes/sdk.php */
class block_playlyfe_sdk {
  public static function get_pl() {
    return(new Playlyfe(array(
      'client_id' => "Your client_id",
      'client_secret' => "Your clint_secret",
      'type' => 'client',
       'store' => function($token) {
         set_config('access_token', $token['access_token'], 'playlyfe');
         set_config('expires_at', $token['expires_at'], 'playlyfe');
       },
       'load' => function() {
         $access_token = array(
           'access_token' => get_config('playlyfe', 'access_token'),
           'expires_at' => get_config('playlyfe', 'expires_at')
         );
         return $access_token;
       }
    )));
  }
}
Now copy the contents from playlyfe.php and paste it into this file just exclude the namespace as it is not needed.
/* classes/sdk.php */
class Playlyfe {
  /* Paste code from the playlyfe.php file here */
}
Step 6 - Talking via Playlyfe's API
Now we are going to make our first request to the Playlyfe API. This request will be to read our game's information. The route is '/admin' which returns the game status.
The response is a json object that looks like this,
{
  "name": "Playlyfe Hermes",
  "version": "v1",
  "status": "ok",
  "game": {
    "id": "MyMoodleGame",
    "title": "MyMoodleGame",
    "description": "Learning through Gamification",
    "timezone": "Asia/Calcutta",
    "type": "native",
    "template": "custom",
    "listed": false,
    "access": "PRIVATE",
    "image": "default-game",
    "created": "2015-05-28T05:33:32.047Z"
  }
}
Now we are going to make the request using the SDK and then display the game information in the block.
We need to modify the get_content function in our block.
/* block_playlyfe.php */
<?php
 class block_playlyfe extends block_base {
    public function get_content() {
      $pl = block_playlyfe_sdk::get_pl();
      $response = $pl->get('/admin');
      $game = $response['game'];
      $this->content = new stdClass;
      $this->content->footer = 'Powered by Playlyfe';
      $this->content->text = '
        <h5>'.$game['title'].'</h5>
        <p> Description - '.$game['description'].'<p>
        <p> Access - '.$game['access'].'<p>
        <p> Timezone - '.$game['timezone'].'<p>
      ';
      return $this->content;
    }
 }
So we make a request with $pl->get('/admin') to the '/admin' route and get the game status. Then we go through the game details from the game object and display the game's title, description, access and timezone in our block content.
This is how the block would look like,
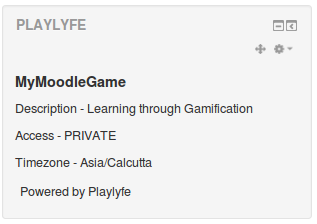
That's it! It's a little long, but pretty simple to follow, isn't it?
As we do at Playlyfe, all the code for this tutorial series is hosted on our Github repository in different branches. The name of the branch is the part number in the tutorial series.
What's ahead?
In the second part of this tutorial series I will show you how to define points and badges in these blocks and award these points and badges when a student finishes a course.
So keep checking here for more awesomeness to follow, or follow us on twitter at @playlyfe.
See you next time!