Introduction
You can use this client in case you don't want to handle authentication in your application and want users to login with their Playlyfe account. This client uses the OAuth 2.0 Authorization Code Grant flow.
OAuth 2.0 Authorization Code Grant Flow
As indicated above, this flow can be broken into the following steps:
As mentioned earlier, in this flow the user authentication is handled by Playlyfe. The use needs to login with with his playlyfe account.
The user is redirected from your application to playlyfe's authorization endpoint.
Here, the user logs into his/her Playlyfe account and are shown an authorization prompt to allow your application to use the their resources on playlyfe.
The user can decide to either grant or deny your application permission. Let us assume permission is granted.
The user is redirected to the redirect URI (provided by you) along with an auth code (as a query parameter). Your client side app passes this auth code to your application's backend.
Your backend then requests Playlyfe for an access token by providing the auth code along with the client's ID and Secret.
Your request is validated and if everything seems right, the Playlyfe server responds with the Access token. Your application can now use the access token to gain access to resources on the user's behalf.
Creating the Client
To create a client, head over to your app and navigate to
Menu > Develop > Clients.
There, add a new client and in the client page select
- Yes for the first question (Should API calls be made from the backend?)
No for the second (Has own login login system?)
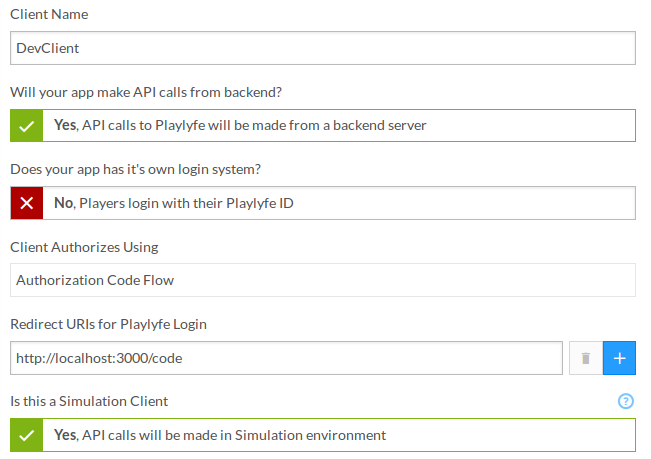
You will need to enter a client name and choose if it is a test client. In a test client, all activity will happen in staging, so that your can safely test your client without worrying about data in production.
The client scopes decide what parts of the API does this client have access to. Be default, the client has access to only Player Runtime routes. You also need to specify a redirect URI, which will be used to redirect the user after authorization.
SDKs
To make things simpler, we have created various SDKs which abstract you from things like refreshing an expired token, attaching it while making requests, etc. You can choose the right SDK based on your preferred language.
Examples
An example of the Authorization Code flow can be viewed at our github repository.
For any futher assistance, you can find us at our forums.