The Jet-Set-Gamify tutorial series focusses on helping you create a kick-ass Gamified app from scratch using the Playlyfe Platform.
This is the second part of the series. View All Parts
So in the previous article we created some basic point metrics and actions and used the SDK to integrate them into our todo app, lets move ahead and see how we can make it better with levels and achievements.
Levels and Achievements are great tools for giving players additional feedback about their status or progress in a particular game or process. They need not be the result of a single action, but can be awarded after a series of events. They can really change how players behave and can act as extra incentives for doing a particular job. A simple example would be a boy scout being given a badge if he sold more than 50 candy bars.
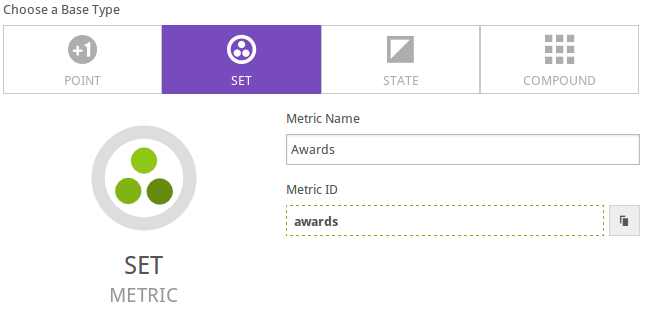
With Playlyfe, you can achieve the same effect with Achievement and Level rules. Rules are basically a set of conditions, which when fulfilled, lead to a specific action. This action could be either giving the player a badge or changing his level. Badges are an example of a set metric, which is basically a collection of unordered items. So a badge set metric can have items like scout of the year award, 50 miler award, leave no trace award and so on. Set metrics can be awarded or unlocked using Achievement rules.
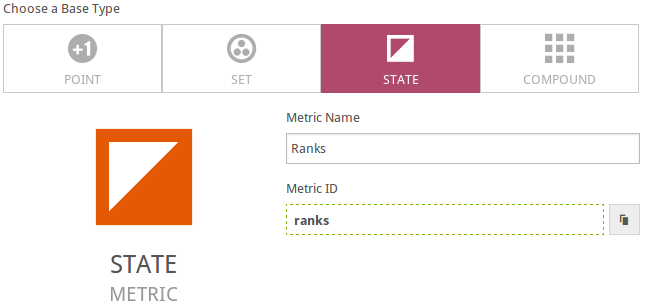
Coming to levels, they are made up of what we called state metrics, which basically contain various states that a player can attain. This state is determined by how much his points are in the base metric. For example, in the army, a soldier has a rank, which is a state metric, with different states being Recruit, Lieutenant, Commander, Major, etc. And the base metric can be, lets say, the number of missions successfully completed. The Level rules basically decide the thresholds between the various levels. This might sound a little confusing, but I promise you will get a better picture once we actually try it on the platform.
Before we create the rules, we need to create the metrics.
Head over to Menu > Design > Metrics and create a new metric. Select the type to be Set and enter the name and ID as awards. The preset items are the different badges. Once your done adding the badges, finish by clicking create.
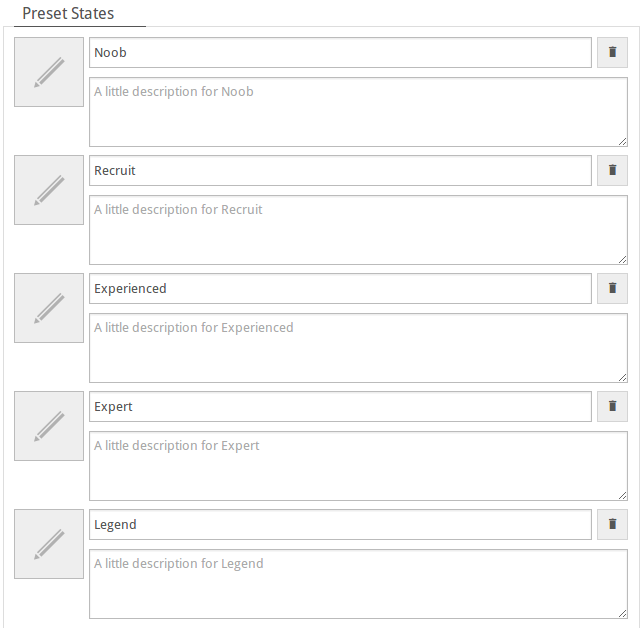
Create another metric of type State and use the name and ID as rank. Preset states are the various states the player can take. Once your done adding them, finish by clicking create.
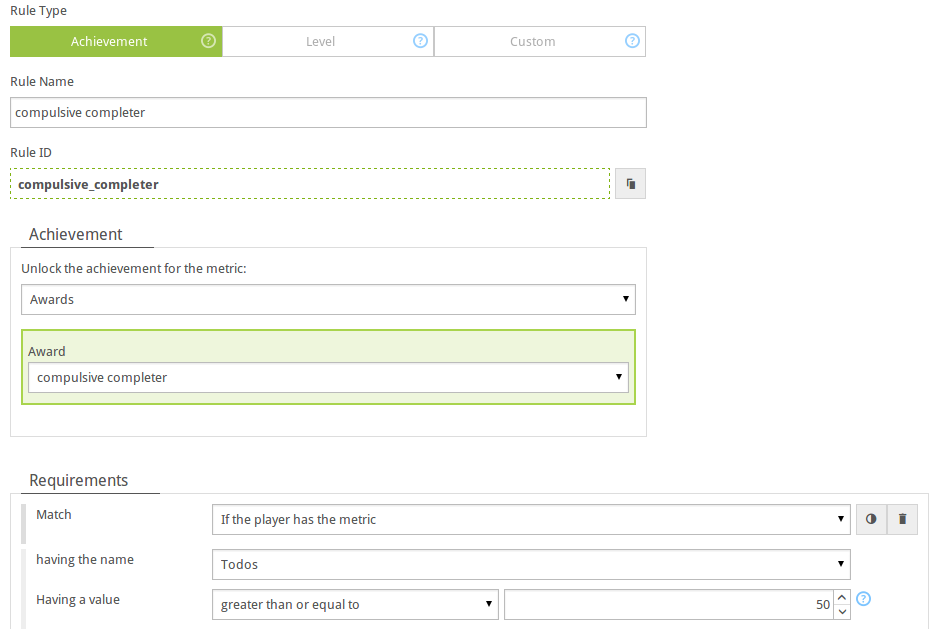
We can now create the rules. Navigate to Menu > Design > Rules and add a new rule. Select type Achievement. Give it a name and ID and select the achievement that you want to unlock with this rule. You can create multiple such rules. For the example app, I created 2 achievement rules, with the following requirements.
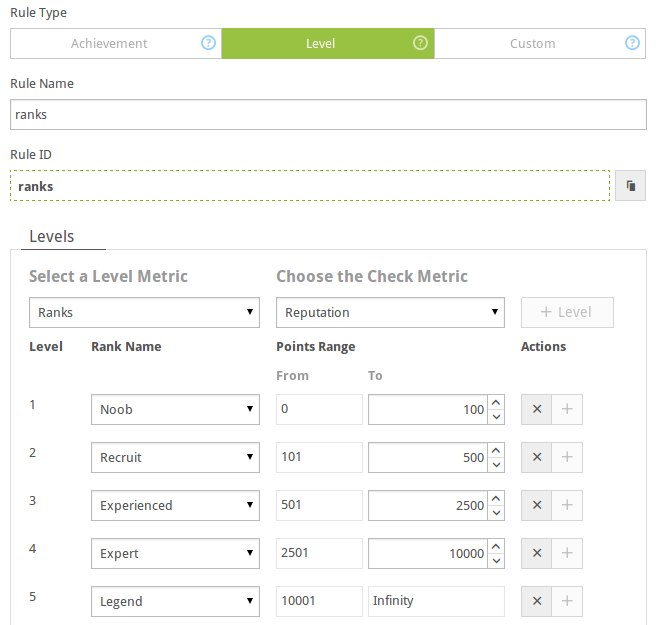
Now create a new rule of type Level. Fill in the Rule ID and Rule Name and enter the following preset levels with the Rep base metric.
Now, I would like to introduce a pretty awesome feature about the platform called Leaderboards. We all know what leaderboards are and how they can create a healthy competitive environment. The really cool thing about leaderboards on Playlyfe is that they update in realtime and you can create as many leaderboards as you want.
You can create them at different levels - overall game leaderboards lets you rank all the individual players, Team leaderboards, where all the teams are ranked against each other and intra team leaderboards, where players are ranked against their own teammates. Each leaderboard can have various cycles - All time (default), yearly, monthly, weekly and daily. There are many more options available, but I will leave them out for now.
To create a leaderboard, navigate to Menu > Design > Leaderboards and click the + button and you should see the following screen (values are for your reference).
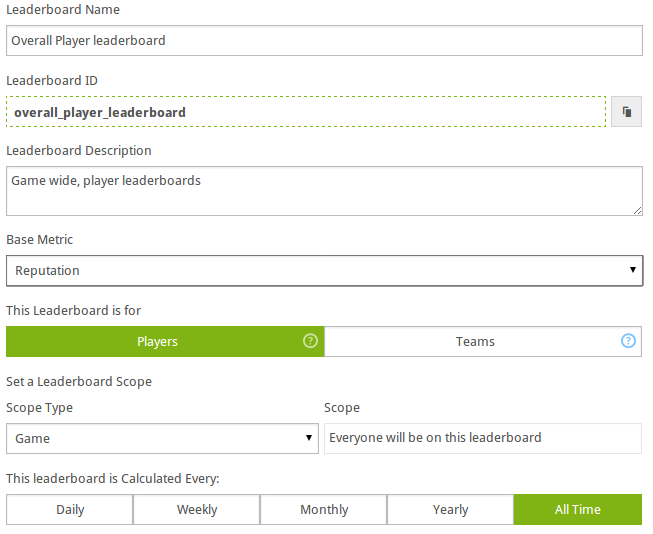
For this app, lets create a regular player leaderboard at the game scope. Enter the leaderboard name, and the ID as overall_player_leaderboard. We will set the game cycle to default, which will give us an all time leaderboard. Select the base metric as Reputation and leave all other options to default.
Integrating your app
The only code we need to add in this stage is the route to read the leaderboard, which can be done simply by writing the following lines.
// js/controllers/main.js
$scope.showPlayerLeaderboard = function(){
  $scope.options.tab = 2;
 client.api(buildRoute('/leaderboards/'+player_leaderboard_id,'cycle=alltime'), 'GET', function(leaderboard){
    $scope.$apply(function(){
      $scope.player_lb = leaderboard.data;
    });
  });
};
That's it! Checkout the step-2 branch to view the entire code for this stage.
git checkout step-2
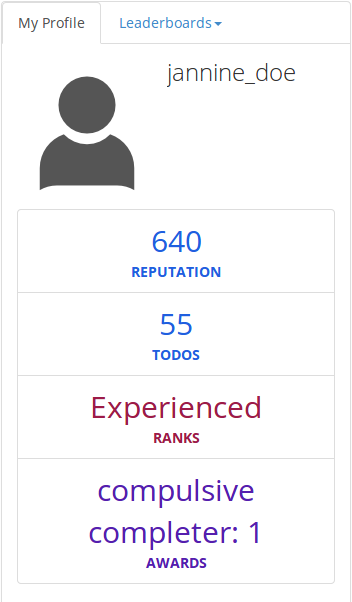
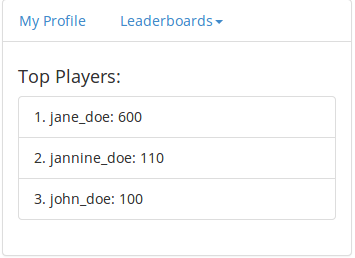
Go to the app and finish off a few todos. You should be able to see the player ranks getting updated. They should also get the relevant badges at the given thresholds. Also checkout the player leaderboards which update in realtime.
Hope you are now comforatble with designing rules and metrics. Lets try taking it up a notch by making this a collaborative process and take a look at the concept of teams in the next article.