The Jet-Set-Gamify tutorial series focusses on helping you create a kick-ass Gamified app from scratch using the Playlyfe Platform.
This is the first part of the series. View All Parts
Welcome to the first part of the Jet-Set-Gamify Tutorial series. By the end of this tutorial you will know how to:
- Create a simple game design on Playlyfe
- Integrate it with an existing browser based application
Lets get started by taking a look at some of the simplest components of a gamified system - Points and Actions.
Points are the simplest of all the metrics. Almost every game made till date has, at some level, the system of points. They provide a basic and an easy way to provide feedback to the player about the worth of their actions.
Actions are basically... actions! They are events, which can be either winning a race, saving the princess or getting a kill.
In Playlyfe, Points can be used to measure progress or performance characteristics of a player. Points are basic yet very flexible and you can really go creative with how you use them. With point metrics, another great thing you get is our real-time Leaderboards. There is a lot to leaderboards, so we'll save them for later.
Actions are simple, lightweight events. Liking a post, sharing a page, posting a tweet are all actions. On Playlyfe, Actions provide you an easy way to capture such events. You can customize these events to a very high level of detail and set probabilities, rate limiting and even control who can perform the action, all within the platform.
With that as introduction, let's work towards creating our demo app.
To view the vanilla app, checkout the step-0 branch of our repo.
git checkout step-0
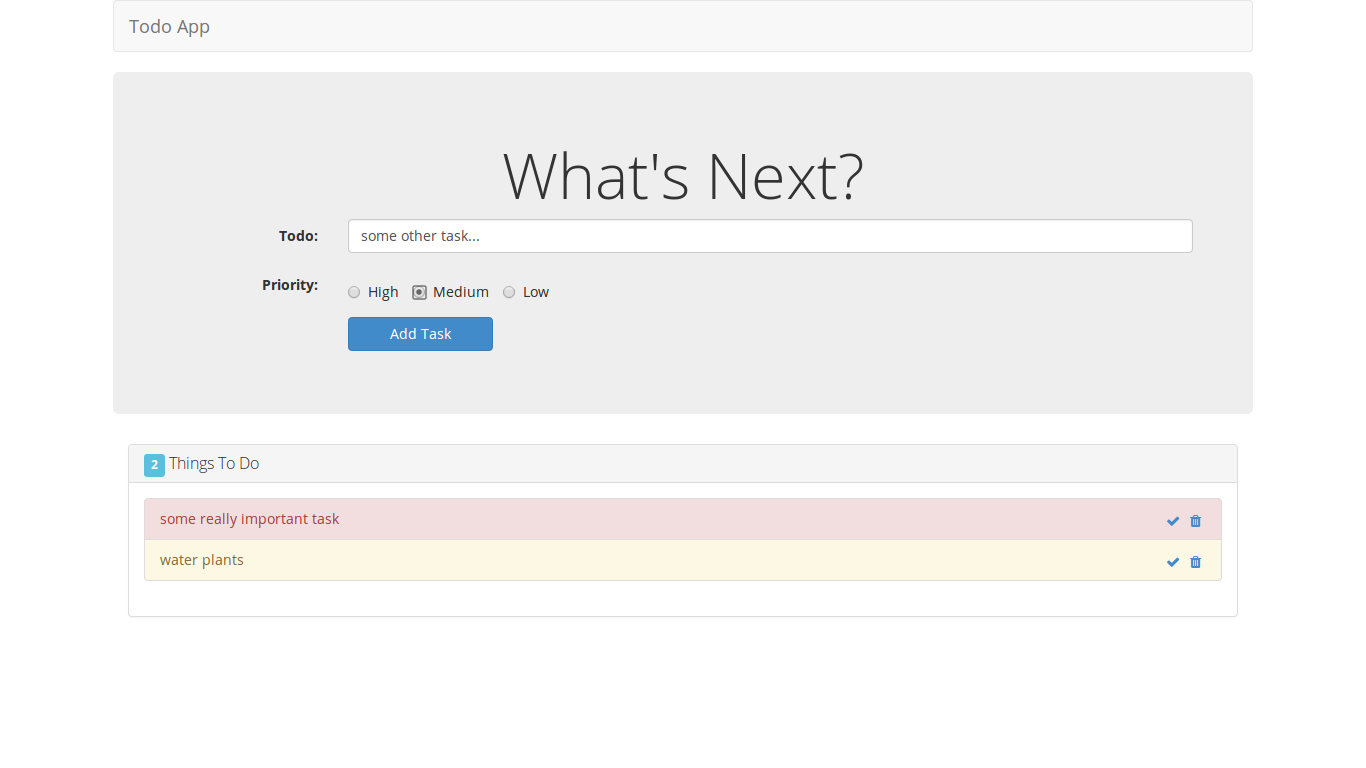
It's a simple Todo app. You can add a todo task with various priorities and strike them off when done.
You can start the app by navigating to the application via command line and type npm start. You will need to do an npm install at least once before you start the app. It will download all required packages (in our case, just express.js and its dependencies). Once the app is up, you should see a message saying App listening on port 8081 in the terminal.
Go to http://localhost:8081 in your browser to view the app.
Now before we touch any code, we would first need to design the application on Playlyfe. For that, we would need an account to make the application, so register in case you haven't.
Once your in, head over to the Playground. This is where you can view all the apps you've created. Click on Create Game and you should see a dialog which is something like this:
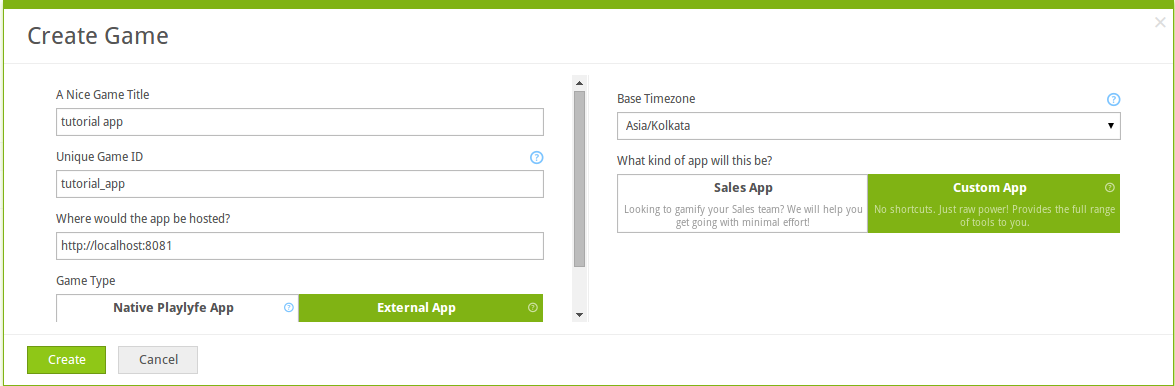
Fill in the desired name for your game and game ID. Game IDs need to be unique on the entire platform, so you might not be able to use the same ID as above. In the Game Type field, you can choose between:
- Native Playlyfe App, which essentially means building a complete gamified app on the platform without writing a single line of code (yes, that's possible!), or
- External App, which means that you'd be writing some code and hosting your app outside of Playlyfe.
The second options is what we currently have, so choose the external app option. Coming to the type of app, we have some design templates for some common use cases. We might be adding more in the future, but for now, choose a Custom App and hit Create.
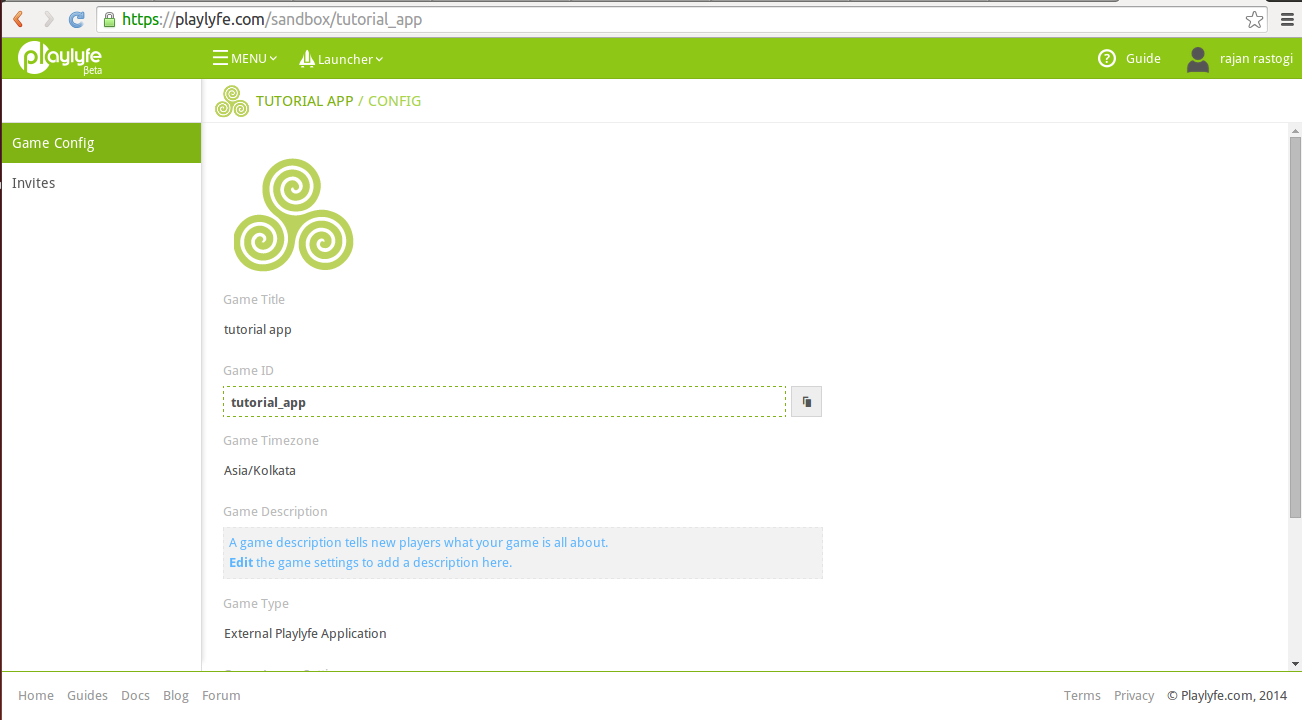
You will now land in what we call the Sandbox. It is here you actually design the game.
When you hover over the menu, you will see options for Design, Develop and Administer. Hover over Design and you will see all the basic game components — Metrics, Actions, Rules, Processes, Leaderboards and Teams. We might will be adding more in the future, so this list might get outdated.
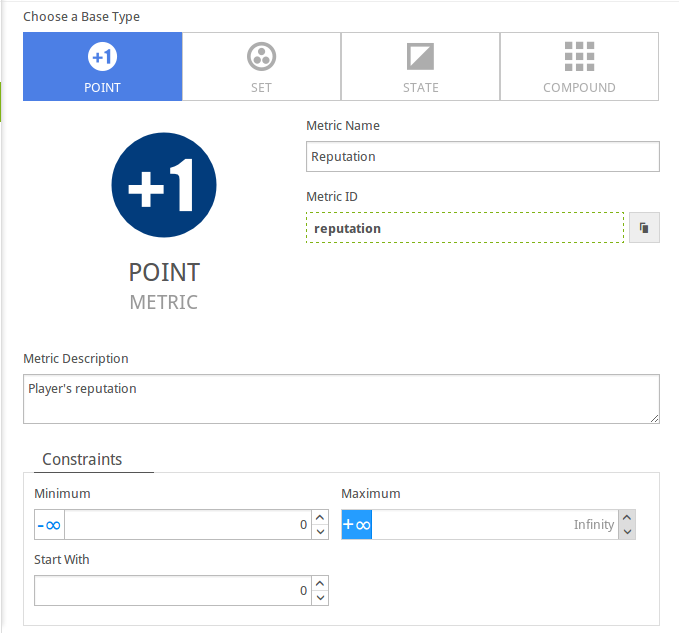
For now, let's have a look at Metrics. Click on Metrics to open the metric builder. On the left hand side, you can see all the metrics in your game. Right now this will be empty since we haven't created any metrics yet. Click on the green throbbing + button to add a new metric.
For our app, we will keep a track of a player's Reputation. Players can earn reputation by completing tasks on the todo list. Higher points are awarded for tasks of higher priority. Let's also use another point metric called Todos which keep a track of how many todos are striked off the list.
To create a point metric, choose the metric type to be point and fill in the Name, ID and Description. You will also see some other options that you can set for this metric. You can set limits for maximum and minimum values, like the speed of your car can't go lower than 0 or your test scores can't go above 100. You also get an option to set a start value which is what we'll start counting from. (We can count from 100 instead of 0!) In our case, for both the metrics, set the minimum value to 0 and leave all other values to default.

Let us now define the user actions which result in earning points.
For our todo app, we can have 3 different types of actions:
- completing a low priority task
- completing a medium priority task
- completing a high priority task
To create actions, go over to the Design menu and click on actions. Click the + button and you will see the action builder to create a new action. As before, enter the Name, ID and Description of the action.
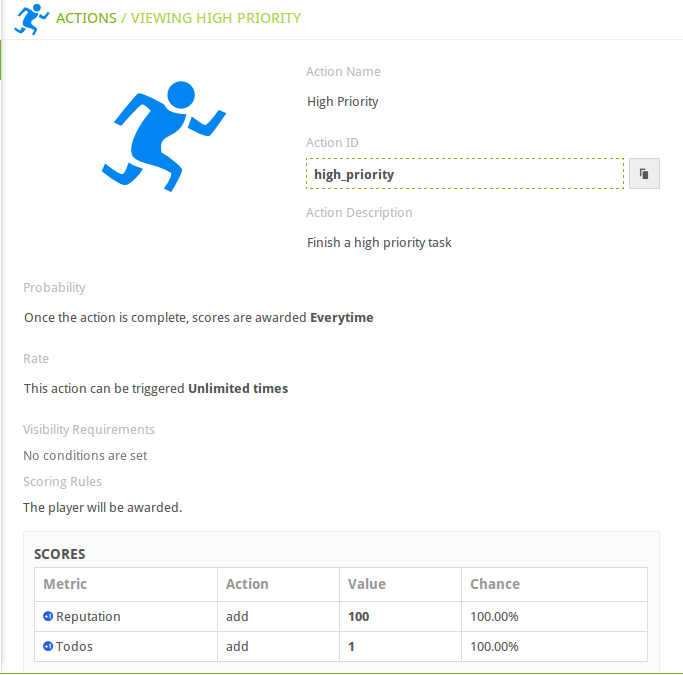
Along with these you will notice a bunch of other options. You can set a Chance or scoring probability to an action, so that if a player completes an action, there a certain chance that he will receive points for that action. By default, it is set to Everytime, which means the player receives the points everytime he does the action.

Next up, there is an option to rate limit the action, which means it can be done a certain number of times in a partcular duration. For example, taking a test once in a day. By default, there is no rate limiting.
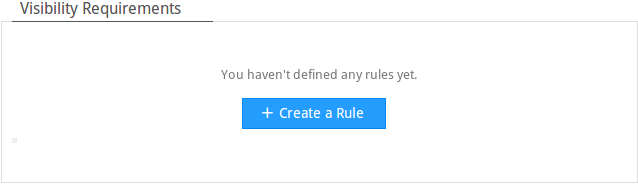
We then see the visibility rules. With these rules, you can configure which players are allowed to perform certain actions. If you have an action called cancel test, you would not want anyone to be able to perform that action, only teachers should be able to perform the action. You can make pretty complex rules, but that's a bit out of scope of this article, but you are welcome to play around with it.
Finally, we need to associate a Scoring Rule for the action. These scoring rules decide the outcome of the action, whether a player gets points, badges or something else on doing this action. You can have multiple scoring rules for the same action.
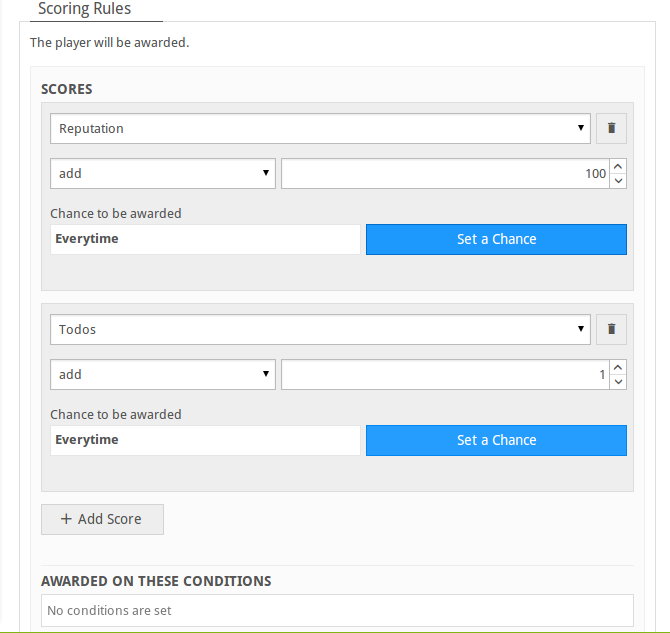
For our app, we will create 3 simple actions:
- Low Priority (+10 rep points, +1 todos, all options set to default)
- Medium Priority (+30 rep points, +1 todos)
- High Priority (+100 rep points, +1 todos)
That's it! This design is enough for us to gamify our todo app, for starters at least. As the article goes ahead, we will add more and more game components into the app.
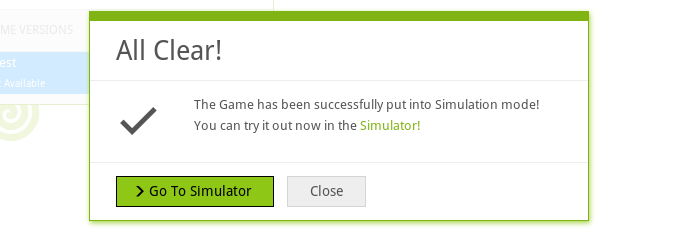
Now that the design is done, wouldn't you want to test it before you actually started customizing it? You can sure do that with our Simulator. The simulator allows you to test your design on the fly, all inside the Playlyfe environment (you don't even need your app for this). In the simulator, you can create dummy players and test out different scenarios. So if you have an action that only a person with a score above 5000 or a role of teacher should be able to perform, you can test that on the simulator.
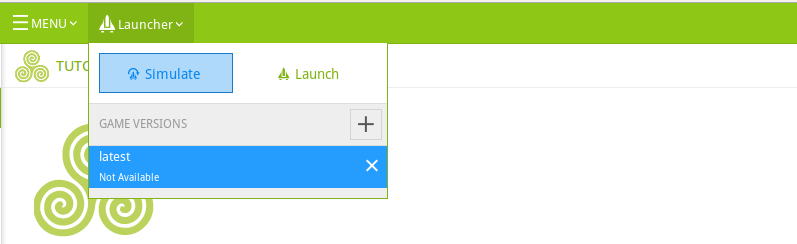
To start the simulator, click on the Launcher and then Simulate. You would then be taken to the Simulator. Here, you first need to add dummy players and then you can use their profile to perform various actions to test out the design. Create 3 dummy players with IDs jane_doe, john_doe and jannine_doe.
Once you're satisfied with the prototype, let's start with the integration.
Integrating your app
You can check out the step-0 branch to view our vanilla todo app. We built our application using Angular.js.
git checkout step-0
Once you have checkout the branch, its structure should look something like this:
Project
|-- public
|   |-- index.html
|   `-- js
|       |-- controllers
|       |   `-- main.js
|   |-- directives
|   |-- lib
|       `-- main.js
|-- README.md
|-- package.json
`-- server.js
We then grab the Playlyfe SDK from Github.
The SDK simplifies communication between the application and Playlyfe. There are various SDK and you can choose the right one based on the type of your application and your preferred language.
You can source the playlyfe-js-sdk.min.js or via CDN, by adding this in the <head> of your page:
<script src="https://cdnjs.cloudflare.com/ajax/libs/playlyfe-js-sdk/0.9.0/playlyfe-js-sdk.min.js"></script>
By doing this, a Playlyfe object gets created and can be used globally.
The JS SDK uses the OAuth2.0 Implicit Grant Flow for authorization and is ideal for browser based apps. The Implicit grant flow is a simpler version of the OAuth2.0 Authorization Code Grant. If you got no idea what I am talking about, no problem, I'll try explaining in brief here.
OAuth2.0 Implicit Grant Flow with Playlyfe JS SDK:
The client (our Todo App) needs to get authorized by the resource owner (User) to access some resources on a resource server (Playlyfe). OAuth defines a set of protocols for this process, and one of them is the Implicit Grant Flow, which is ideal for browser based applications.
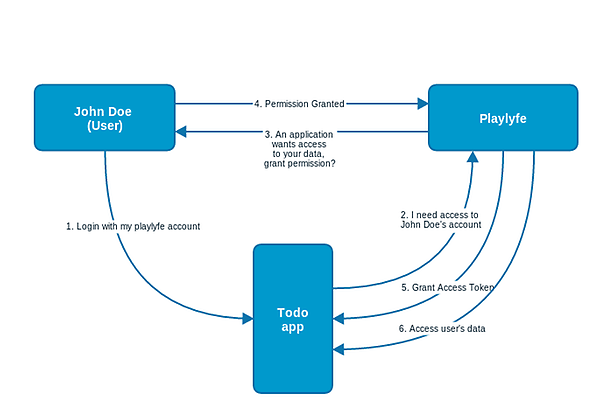
In this flow, the client (App) redirects the resource owner (User) to the authorization end point (Playlyfe). Here, the resource owner can decide if he wants to grant access to the client. If he does so, the user is first authenticated by the authorization server (Playlyfe) and is then redirected back to the client using the redirect URI provided by the client along with the access token. The client can now use this access token to access the user's resource.
A similar flow needs to take place in our todo app. When the user opens the app, the first thing we need to do is check if the user is logged in. To initiate this process, all we will have to write a few lines.
Creating a Client
To connect our app to the game on Playlyfe, we need to create a client. To do so, go on to Menu > Develop > Clients. By default, you will have 2 clients, Native and Simulator. To add a new client, click on the + button.
In the new client form, give the client a Name. Since our app has no backend, we need a client with type No Backend. We will make the client a test client, so that we can test the integration with this application. When the app goes live we can just switch off the test mode.
We will also need to enter a Redirect URI. This is the URL that the player will be redirected to after authorization (more on this later in the post). For our app, the redirect uri needs to be:
http://localhost:8081
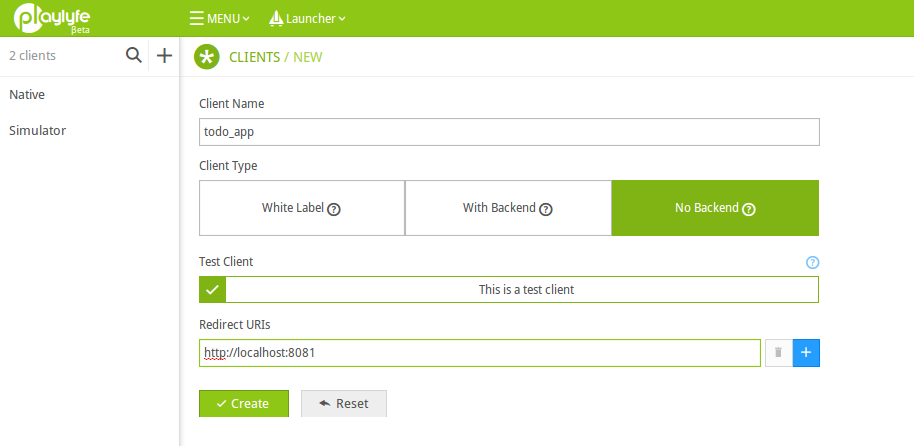
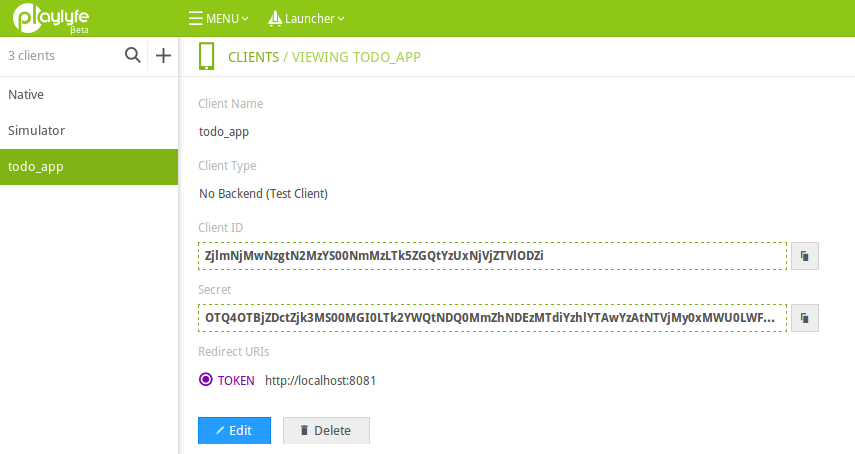
Hit create and you will be given a Client ID and Client Secret. You will need these later on when your app tries to contact Playlyfe.
Setting up Our Client
First we need to create the client, which should ideally be done at the start of the app.
// /public/js/main.js
app = angular.module('simpleTodo',[]);
app.run(function(){
  client = new Playlyfe.init({
    client_id: 'CLIENT_ID',
    redirect_uri: 'REDIRECT_URI'
  })
});
You can get the CLIENT_ID and REDIRECT_URI from the client we made earlier. You can find it at Menu > Develop > Clients. The client object is available in the global scope and we will be using it to make API calls to Playlyfe. Also, in public/js/controllers/main.js, make sure that the value of the variable game_id matches your game's ID, which in my case is tutorial_app.
So till now, in our vanilla todo app, we did not have a concept of users, but with Playlyfe, we can add with just a few simple lines of code.
When the application is loading, we need to check if the current user is logged in or not, this can be done with the following few lines:
// /public/js/controllers/main.js
if (Playlyfe.getStatus().msg !== 'authenticated') {
    $scope.logged_in = false;
  }else{
    $scope.logged_in = true;
    refreshPlayer();
  }
To initiate this process, the user would first need to authenicate the app via the OAuth Implicit grant flow. In our app, if the user is not logged in, we take him to a login page:
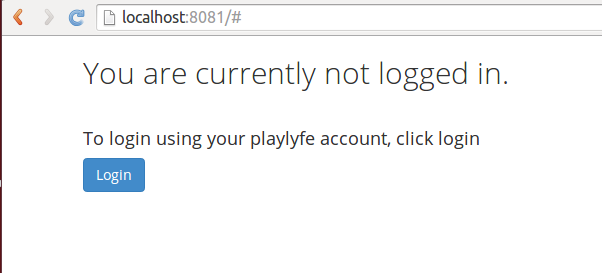
When the user clicks login, we start the authentication process. This is done in our login function in the main controller.
// /public/js/controllers/main.js
$scope.login = function() {
  client.login();
};
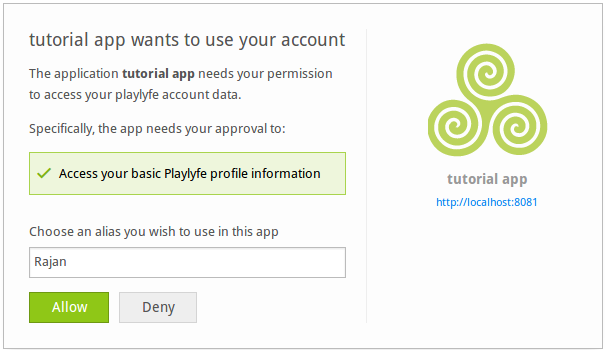
This redirects the user to the authorization end point (http://playlyfe.com/auth). The user will then be presented with a authorization dialog to allow the todo app to access the playlyfe profile of the user.
Once authorized, the user is redirected to the given redirect URI along with the access token. The access token can be accessed using the getAccessToken function.
client.getAccessToken()
You can view the profile of the player by making a simple request to the Playlyfe servers. We do that in our refreshPlayer function where we make a simple /player call to Playlyfe using the SDK.
// /public/js/controllers/main.js
var refreshPlayer = function(){
  var access_token = client.getAccessToken();
  // fetch player data
  client.api(buildRoute('/player'),'GET', function(data){
    $scope.$apply(function(){
      $scope.player = data;
      $scope.player_activity = [];
      // get player profile image
      if($scope.environment!=="staging"){
        $scope.player.avatar = "https://api.playlyfe.com/v1/assets/players/" + data.id + "?size=small&access_token=" + access_token;
      } else {
        $scope.player.avatar = "https://playlyfe.com/images/platform/defaults/default-user.png";
      };
      // load todos
      $scope.loadTodos();
      // get auth token for notification stream
      client.api(buildRoute("/notifications/token"),"GET", function(data){
        // open notification stream
        Playlyfe.openNotificationStream($scope.environment, $scope.game_id, $scope.player.id, data.token, function(message){
          $scope.$apply(function(){
            $scope.player_activity.unshift(message);
          });
        });
      });
    });
  });
};
In the above code, we first fetch player data, which would contain the player alias, his current scores and team information. We then open a notification channel to get real time notifications.
You can see the full set of API routes at our API documentation.
The data we get from the notification channel has a slightly complex structure, so we use the playlyfe odysseus library to help us parse it. It converts the JSON data, which contains information such as the type of event, when it happened and what happened to a human readable string.
The project can be found on github.We can source it by including odysseus.min.js directly in our app or via CDN :
<script src="https://cdn.rawgit.com/playlyfe/odysseus/develop/lib/odysseus.min.js"> </script>
In angular, we use odysseus in an directive - story_builder.js - to add this data into our DOM. If you are not familiar with angular, directives basically let you extend HTML and add new elements/attributes to teach it some cool tricks. It is used in our index.html like this:
<li class="list-group-item" data-ng-repeat="story in player_activity" data-ng-show="$index<2">
  <div data-pl-story-builder="story" data-pl-story-context="player" data-pl-profile-data="player" data-pl-env="{{environment}}">
  </div>
</li>
In the next step of integration, we need to trigger actions when a particular activity is done by the user. In our case, when any todo is finished, we will make a call to Playlyfe to execute an action. For that, we need to add the following lines in our finishTodo function in the main controller.
// js/controller/main.js
$scope.finishTodo = function(todo){
  $scope.deleteTodo(todo);
  $scope.saveTodos();
  client.api(buildRoute('/action/play'),'POST',{id:todo.priority}, function(data){
    client.api(buildRoute('/player'),'GET', function(data){
      $scope.$apply(function(){
        $scope.player = data;
      });
    });
  });
};
Since its a post request, we can send some data in the request body. In the case above, we send an object with a key id. This id should match the id of the action that we had created earlier on the platform. In our app, that can be high_priority, medium_priority or low_priority. Also, buildRouteis a simple helper function that modifies our route slightly based on the application environment, which can be either staging or production, we will look at that later, but for now, you can ignore that function and assume that it would return the same string which is passed into its parameters.
Once that is finished, we are pretty much done ! We just add a few more lines of code to display the user profile and realtime notifications, you can view the complete code by checking out the step-1 branch.
git checkout step-1
The project structure would now be:
Project
|-- public
|   |-- index.html
|   `-- js
|       |-- controllers
|       |   `-- main.js
|   |-- directives
|   | `-- story_builder.js
|   |-- lib
|   | |-- odysseus.min.js
|   | `-- playlyfe-js-sdk.min.js
|       `-- main.js
|-- README.md
|-- package.json
`-- server.js
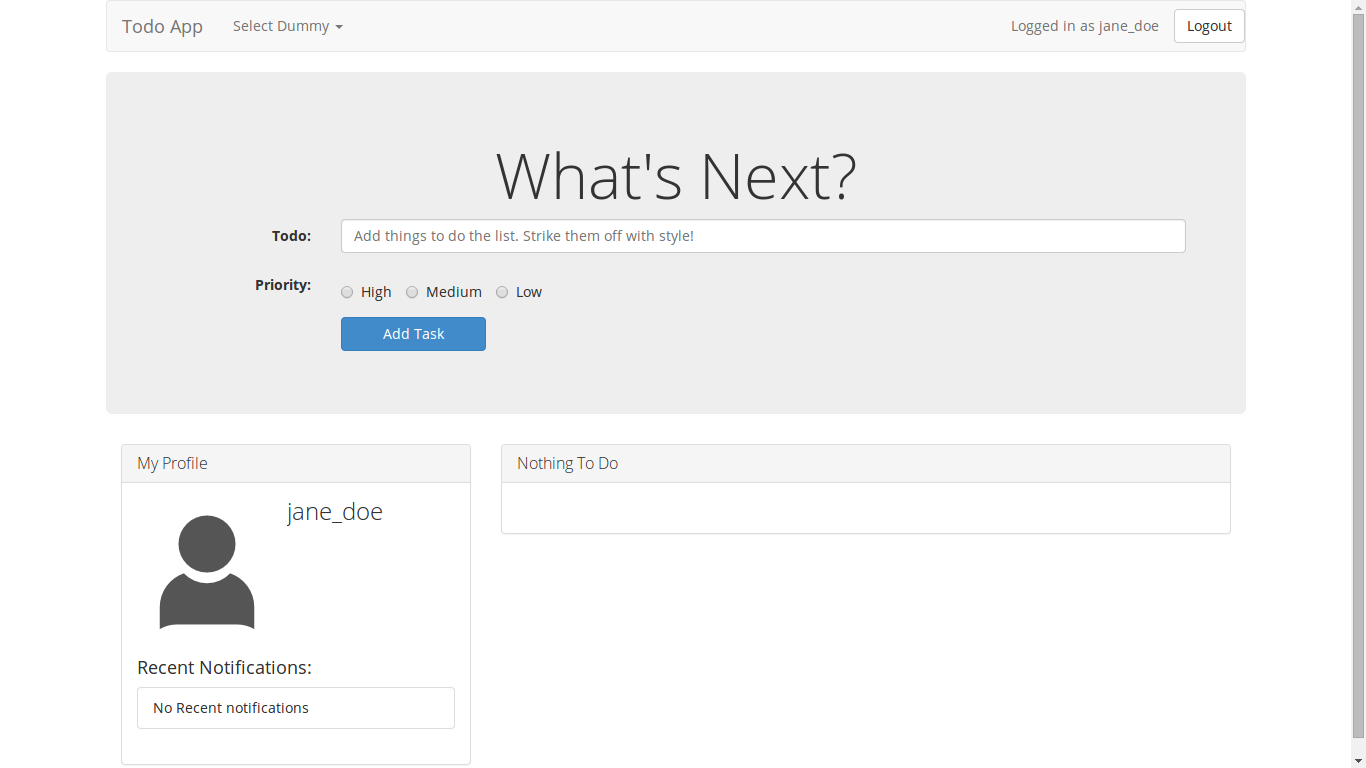
Now start the app and check it on your browser. If it is in the staging environment, it should look something like this:
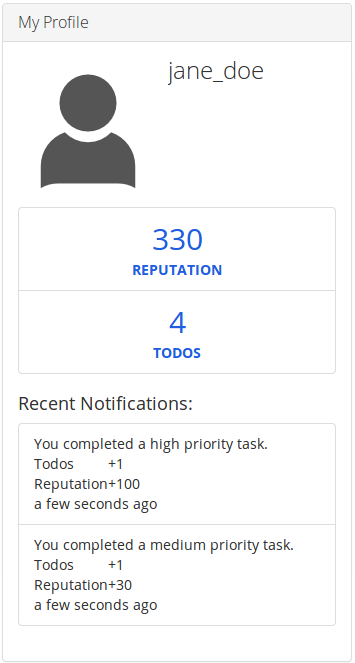
Once you do a few todo tasks, your player profile would reflect all those changes.
So now that you are familiar with the complete flow, lets move on an add some more game components into our app. In the next article, we will be looking at adding levels and achievements into our application.